# Update Entra ID Secret

To update the Entra ID secret, we need to create a new secret in the Inforiver Entra ID application.

### Steps to Create Secret in Inforiver Entra ID App

1. Select the Inforiver App Registration.

<figure><img src="/files/fi4evB7nOMueiwTQGjQC" alt=""><figcaption><p>App Overview</p></figcaption></figure>

2. Go to the **Certificates & secrets** menu and then click **New client secret**.

<figure><img src="/files/tuH1aac6zrbM195FhR8X" alt=""><figcaption><p>Secret Generation</p></figcaption></figure>

3. Add 'O365\_APP\_SECRET\_ID' as a client secret and set its expiration as well.

<figure><img src="/files/dkJSKuH9UD78FTEbcth9" alt=""><figcaption><p>Adding the client secret and its expiration</p></figcaption></figure>

The client secret is added, as shown below:

<figure><img src="/files/swLsLnJef4KCDpCZm7S5" alt=""><figcaption></figcaption></figure>

### Methods To Update Entra ID Secret

1. Direct Update in Azure App Service
2. Update via Azure Key Vault

### 1. Direct Update in App Service Environment Variables

1. Select the App Service.
2. In the left-side menu, click **Environment Variables**.
3. Select 'O365\_APP\_SECRET\_ID'. Click the **Edit** icon to edit.

<figure><img src="/files/bv5B4tRkPfExgTBTu7ED" alt=""><figcaption><p>Edit O365_APP_SECRET_ID </p></figcaption></figure>

4. Enter the client secret in the Value field.

<figure><img src="/files/SIvjN373NUvDiTCOnbbx" alt=""><figcaption><p>Enter client secret</p></figcaption></figure>

5. Click **Apply** to save the changes.

### 2. Update the Entra ID Secret in Azure Key Vault

#### Prerequisites

#### Azure Roles:

* You must have the **Key Vault Administrator** role for **the key vault** to add the new client secret.
* You must have the **Contributor** role for **the key vault** to change the network settings of the key vault.
* You must have the **Contributor** role for **the App Service** to restart the App Service.

#### Step 1: Turn on Public Access to Key Vault (Temporary)

1. Go to the Azure Portal.
2. Navigate to your Key Vault.
3. In the left pane, select **Networking** in the **Settings** section.
4. Under **Firewalls and virtual networks**, switch from 'Disable public access' to **'Allow public access from specific virtual networks and IP addresses'**.                                                 &#x20;

<figure><img src="/files/n2ad3bdeksP4dDMsICDJ" alt=""><figcaption><p>Allow public access from specific networks and IP addresses</p></figcaption></figure>

5. Click on **Add your client IP address** and click **Apply**.

<figure><img src="/files/bspVGsnl5KjhO3FljDnE" alt=""><figcaption><p>Adding your client IP address</p></figcaption></figure>

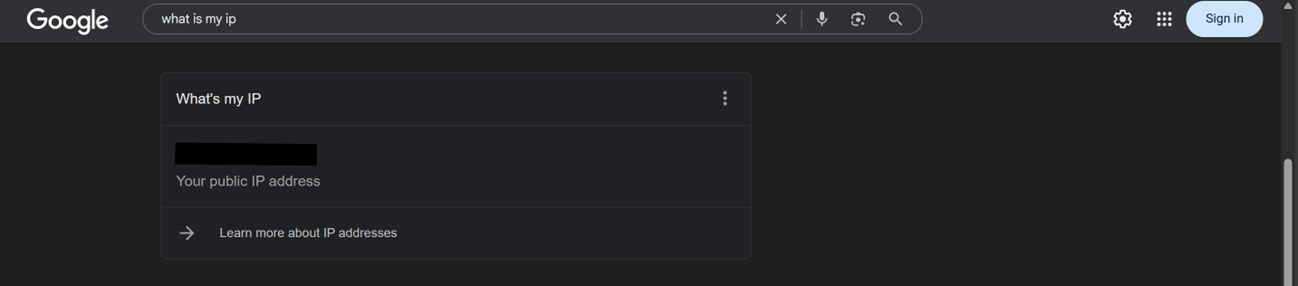
6. Open a browser and search “What is my IP” to get your IP address.                                                                                            &#x20;

<figure><img src="/files/ocRdK4CKGFTFMmnSlCld" alt=""><figcaption><p>Get your IP address</p></figcaption></figure>

7. Copy the IP address and enter the value into the **'IP address or CIDR'** block and click **Apply.**&#x20;

<figure><img src="/files/12fnmRrubot5GMm6wKSD" alt=""><figcaption><p>Enter IP Address</p></figcaption></figure>

#### Step 2: Update the Client Secret in Azure Key Vault

1. Go to the **Secrets** section under the **Objects** menu in the Key Vault.&#x20;

<figure><img src="/files/voPZEtv9atCbL3TlldGD" alt=""><figcaption><p>Go to 'Secrets' section</p></figcaption></figure>

2. Click on **aadAppSecret.**

<figure><img src="/files/5vgZmzYDt7CgCZQiJug9" alt=""><figcaption><p>Click 'aadAppSecret'</p></figcaption></figure>

3. Click **+ New Version.**

<figure><img src="/files/YmIAjpomyzAWGNoAWqzB" alt=""><figcaption><p>Adding new version</p></figcaption></figure>

4. Enter your client secret into the 'Secret value' field and click **Create**.

<figure><img src="/files/DO1isbaBSXU6gnkMA49S" alt=""><figcaption><p>Enter the secret</p></figcaption></figure>

#### Step 3: Ensure App Service Picks Up the New Secret

1. Go to the **Environment variables** section in the App Service. Click on **Pull reference values** to pull the latest values from the key vault secret.

<figure><img src="/files/O0w45EqGWcWv8UkyZbCI" alt=""><figcaption><p>Pull reference values</p></figcaption></figure>

2\. Click **Confirm**.

<figure><img src="/files/dyXPw47fTuMSe4Y9EuPk" alt=""><figcaption><p>Confirm</p></figcaption></figure>

#### Step 4: Revert Key Vault to Private Access

Go back to Key Vault’s **Networking** section, select **Disable public access**, and then click **Apply.**&#x20;

<figure><img src="/files/52aIM20TlQT2VEkjcDVF" alt=""><figcaption><p>Disable public access</p></figcaption></figure>

{% hint style="info" %}
Note: It may take a few minutes to replicate the secrets from the Key Vault. If this does not happen immediately, we recommend restarting your app service.
{% endhint %}


---

# Agent Instructions: Querying This Documentation

If you need additional information that is not directly available in this page, you can query the documentation dynamically by asking a question.

Perform an HTTP GET request on the current page URL with the `ask` query parameter:

```
GET https://docs.inforiver.com/inforiver-enterprise-on-prem/how-to-guides/update-entra-id-secret.md?ask=<question>
```

The question should be specific, self-contained, and written in natural language.
The response will contain a direct answer to the question and relevant excerpts and sources from the documentation.

Use this mechanism when the answer is not explicitly present in the current page, you need clarification or additional context, or you want to retrieve related documentation sections.