
Export to PDF & Excel
Premium Table allows you to export the table/matrix as either PDF or Excel. The industry-leading export capability delivers the following:
Export with formatting, category, or value structur,e and notes
Export table/matrix along with scaled number formatting
Export calculated rows, columns, and edited cells
End-users in the Reading view can customize export options
Export to Excel with Expand/Collapse capability
Export to multiple Excel worksheets based on category
Pagination & page-break support for Export to PDF
You can find the export option in the Export ribbon. There are two sections: Export to PDF and Export to Excel. Let's look at them one by one.

1. Export to PDF
The first step in exporting as a PDF file is to configure the page setup.
1.1. Page Setup
The page setup section provides options to customize the content order, page size, orientation, margin, font, image/logo, comment settings, etc. Click on Page Setup. A side panel opens as shown.

Content Order: When the number of rows/columns doesn't fit on a single page, you can define the order in which the rows/columns are exported using the Content order option.
Let's consider an example. Based on the page scaling, only 2 columns and 20 rows can be accommodated on a single page.
When the 'Row first' option is chosen, the remaining rows for the first 2 columns are displayed on the second page. The contents of each page are shown in the image below.

When the 'Column first' option is chosen, the remaining columns for the first 20 rows are displayed on the following 5 pages. The rest of the rows are exported from page 6 onwards. The contents on each page are shown in the image below.

The attached PDF files show the difference between the row and column first options.
Page size: Select the 'Page size' from the drop-down - Available sizes are Letter, A3, A4, A5, Tabloid, and Legal.
Orientation: Select either Landscape or Portrait as page orientation.
Scaling: Scale the page manually by percentages or automatically scale to fit all columns in a single page using this option.
Margin: Apply a narrow, normal, or wide margin as per your requirement.
Font: Select a font style from the available options in the dropdown. Custom fonts can also be used when exporting.
Show header and footer: You can show the header and footer either only on the first page or on every page.
Add image/logo to the first page: You can create a cover page for your report using this toggle. Select a custom image to use as the cover page.

Use as background image: If you want the image to fill the entire cover page, select this checkbox.

Margin and alignment: The logo can also be aligned using the margin settings as well as the horizontal and vertical alignment options, instead of filling the entire cover page.

Export with conditional formatting
When you've applied conditional formatting in your report, you can decide whether to retain the formatting in your exports. Select the conditional formatting rules that you need to export.

Notice how the data bars in the Margin measure and the flag icons in the Projections measure haven't been exported to the PDF file since we deselected those 2 rules.

Include footnotes: You can select this option to export the footnotes along with the table/matrix.

Include Global/Locale variable: Select this option to include global and local variable selections/inputs in the exported PDF.

Decimal Precision: Set a custom decimal precision for the export.
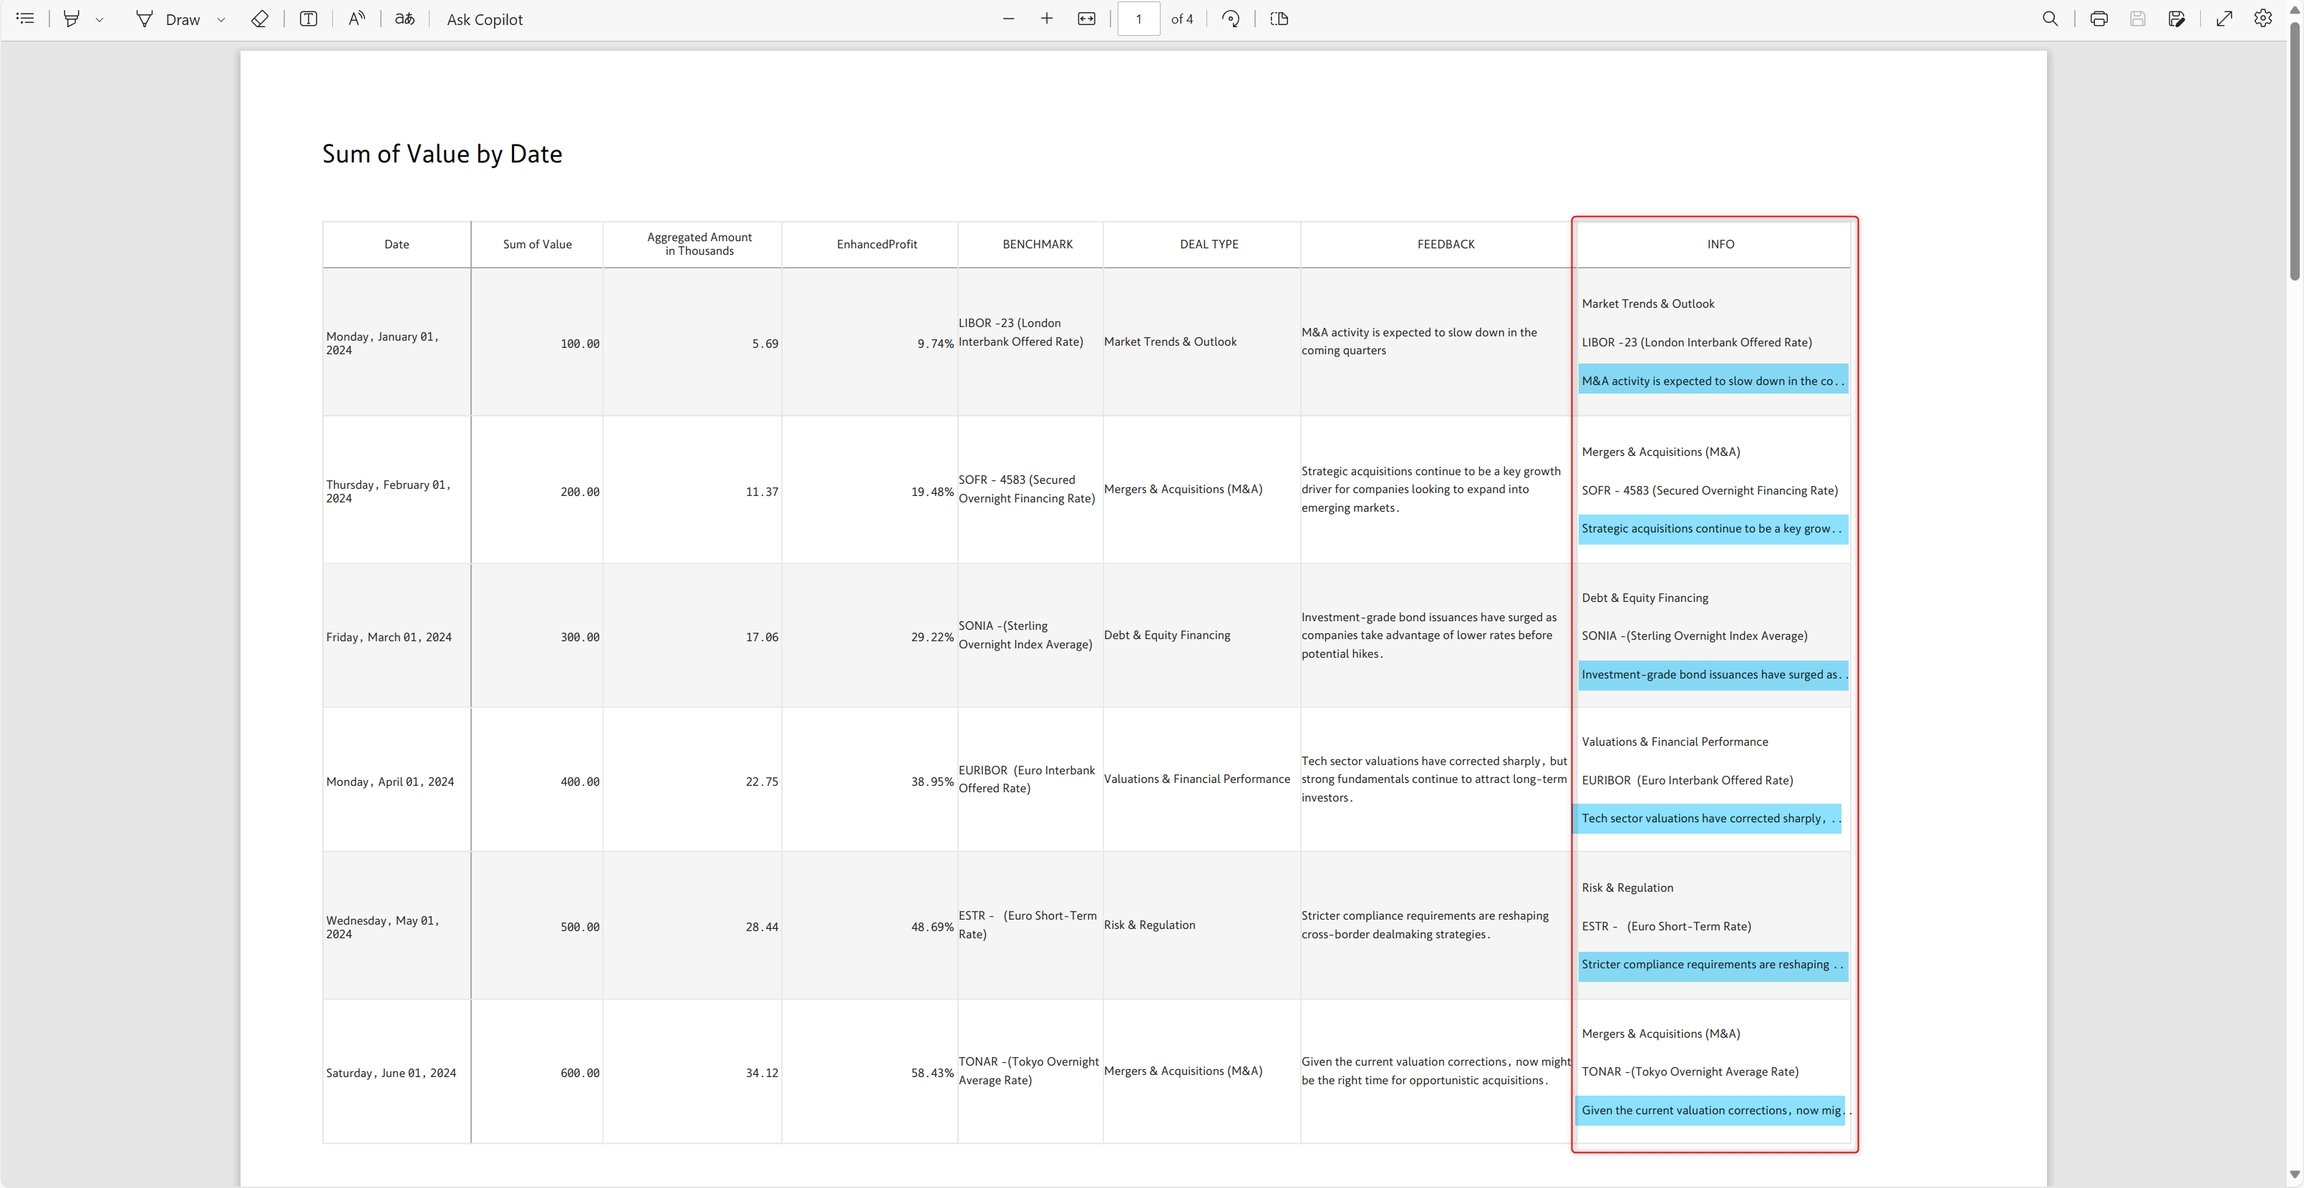
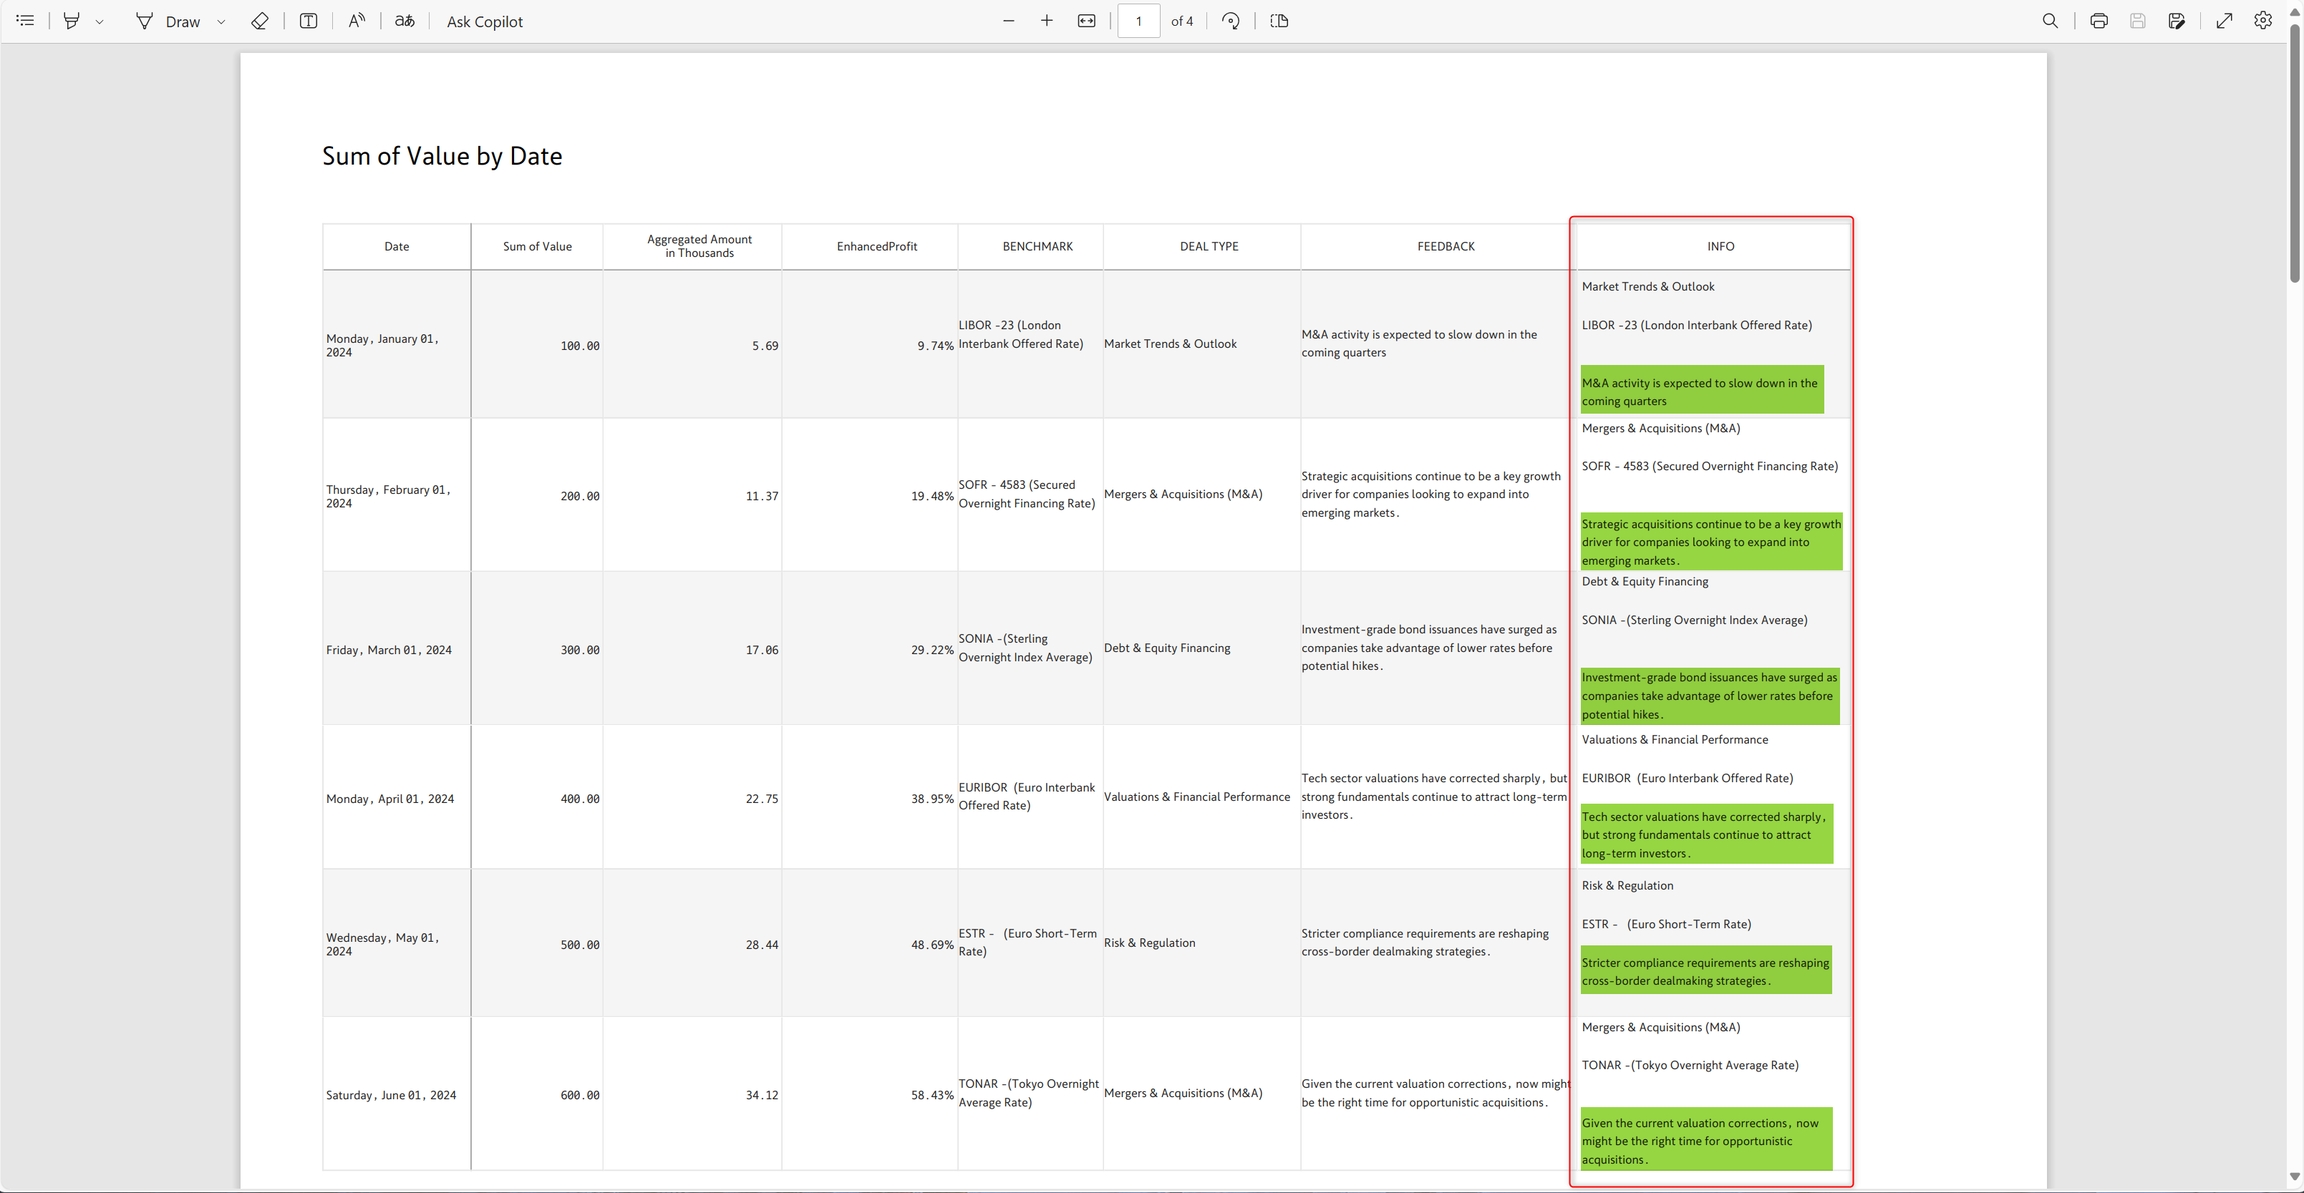
Word Wrap: The 'Word Wrap' options are specifically intended for reports that are formatted using table functions.
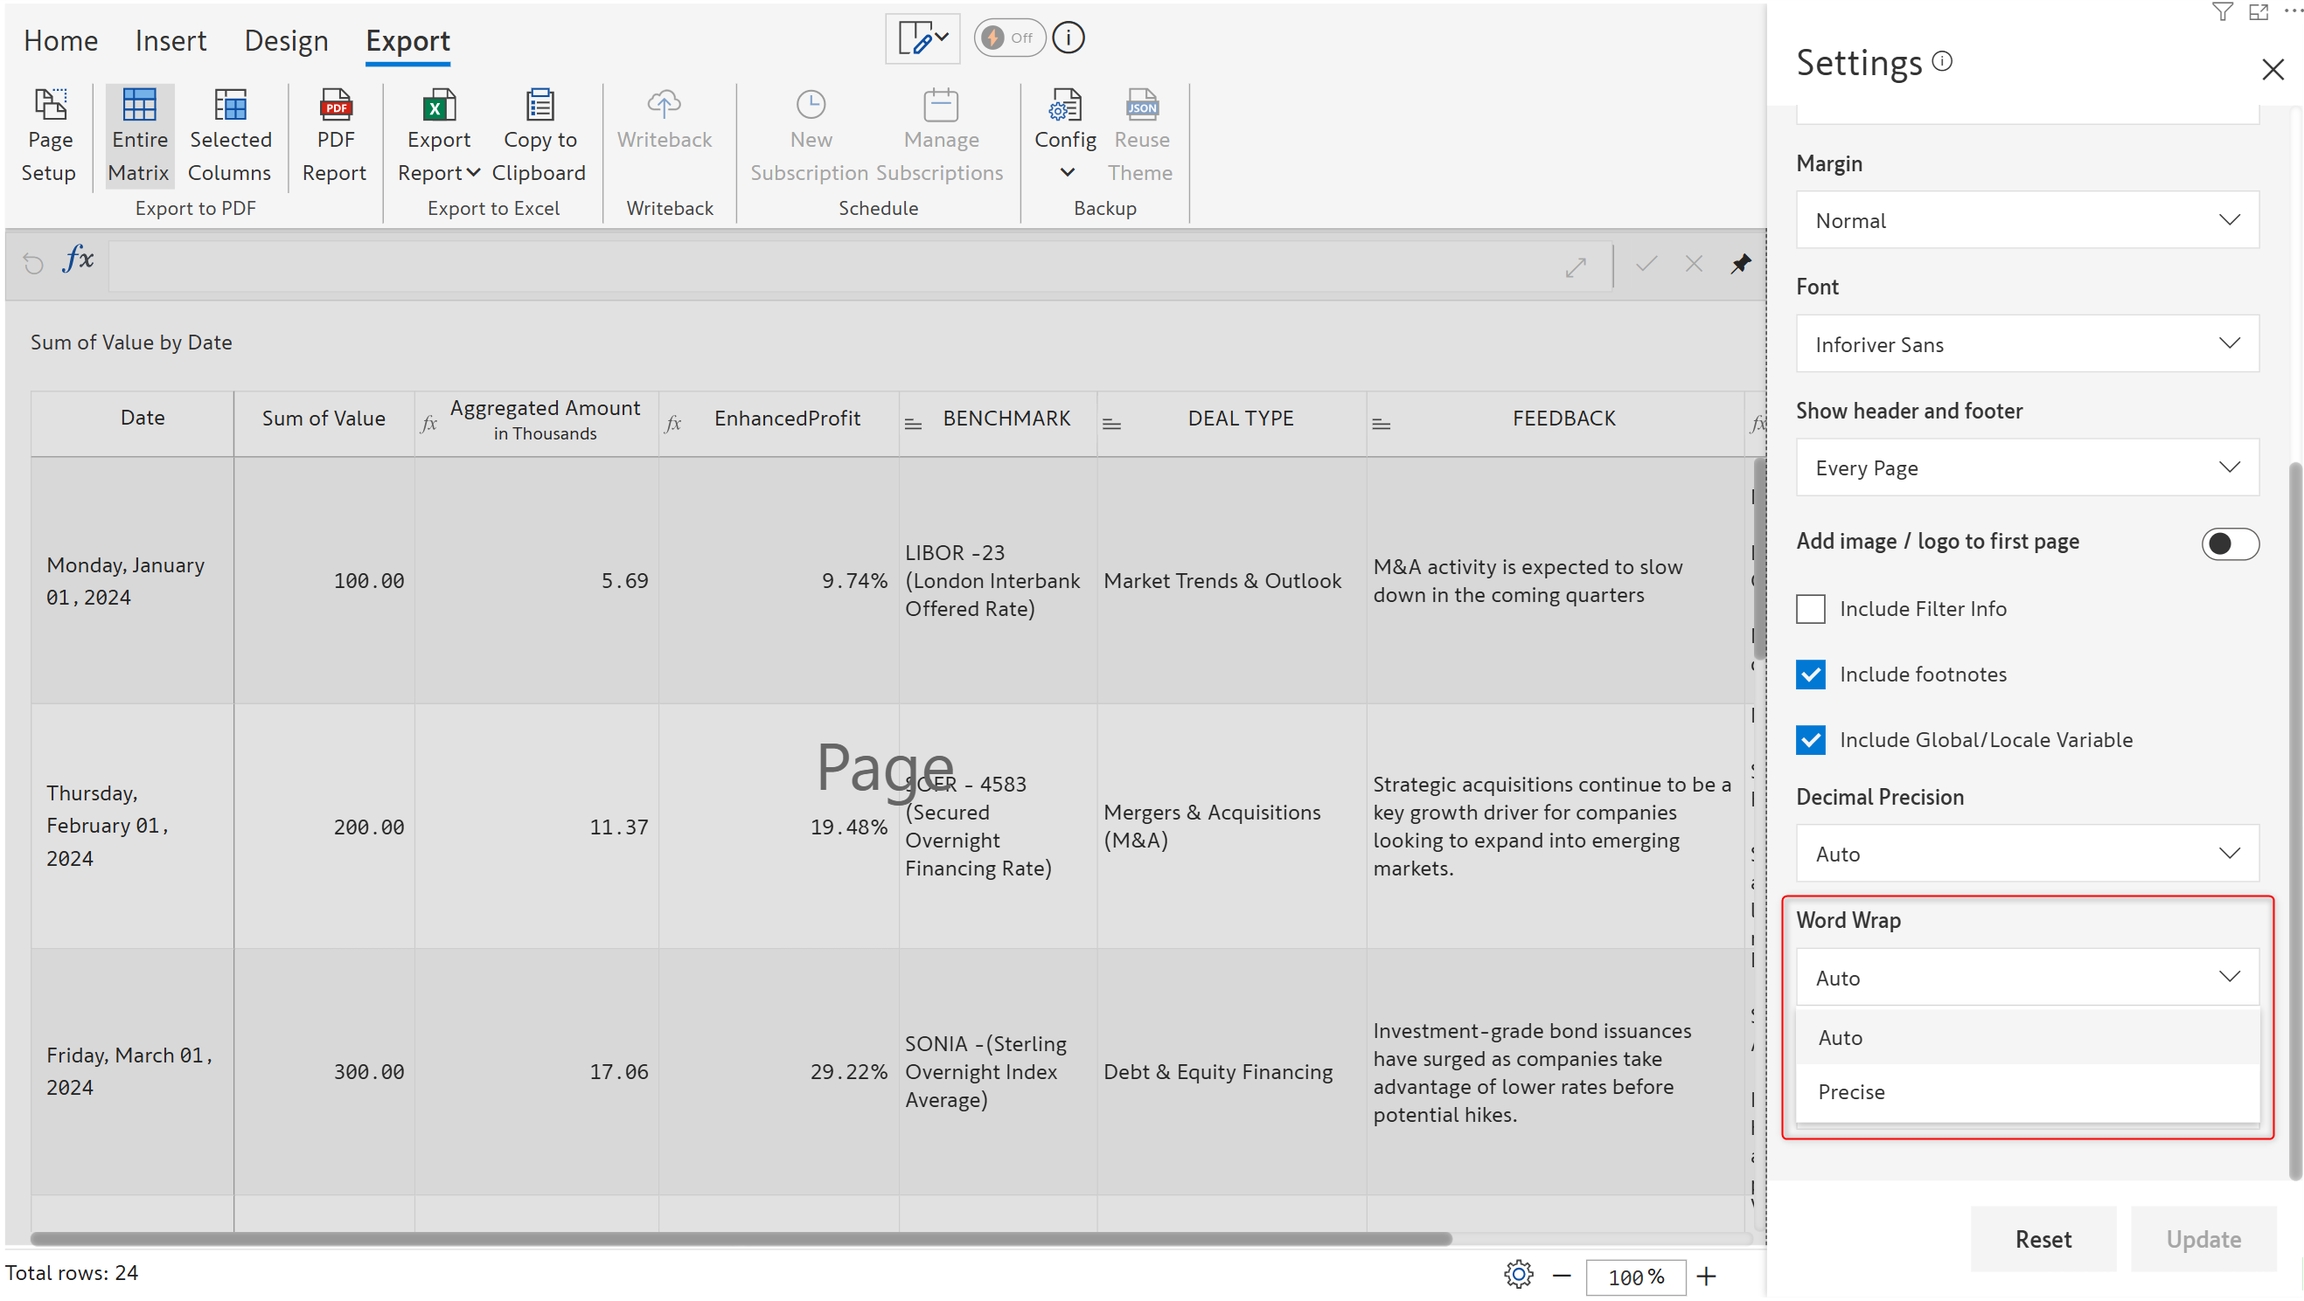
The 'Precise' option enables word wrapping, ensuring that overflowing rows are wrapped onto the next line and fully visible in the PDF export. In contrast, the 'Auto' option does not apply word wrapping, which may result in truncated data. The highlighted text in the screenshots depicts the difference between Auto and Precise word wrapping.
Footnote position: You can set the footnote position as,
Last Page: Footnotes get printed on the last page.
Dynamic: Based on the available space, footnotes get printed either on the same page where they are added or on the last page.
Finally, click Update to save your page setup preferences, or click on 'Reset' to reset all your selections to defaults.
1.2. Exporting
Once the page setup is complete, you need to decide whether to export the entire matrix or just select specific columns.
Entire matrix
You can export all the rows and columns by clicking Entire Matrix.
Click on PDF Report to export the file in PDF format.

A pop-up appears as shown. The PDF file can be saved to the computer.

The entire matrix gets exported as shown.

Selected columns
If you do not want to expose all the fields in your report, click Selected Columns, as highlighted in the image below.

The selected columns are downloaded as shown.

2. Export to Excel
2.1. Excel header settings
You can customize report headers in Excel exports. Click the expand icon highlighted in the image to open the header settings.

Premium table provides extended support for exporting header elements such as dates and symbols. From the header settings UI, you can quickly select the lines of the header that you want exported to an Excel file.

If your reports use charts or images in the header and footer, Inforiver enables you to export them as an image to an Excel file.

2.2. Exporting
Click the Export Report button to download your report to an Excel file.

3. Copy to clipboard
You can copy the data in your report, including calculated rows/columns, and notes (if there are any). The copied data can be easily pasted into an Excel sheet.

The data has been copied and pasted into an Excel sheet, and it is displayed as shown.

Last updated