Miscellaneous settings
Learn how to use the Miscellaneous settings under the Display section such as view options, status Bar, and cell settings to enhance usability and fully customize your Power BI reports with Inforiver.
1. View
1.1. Visual context menu
When the Visual context menu toggle is enabled, a context menu is displayed when you right-click a row in the report.

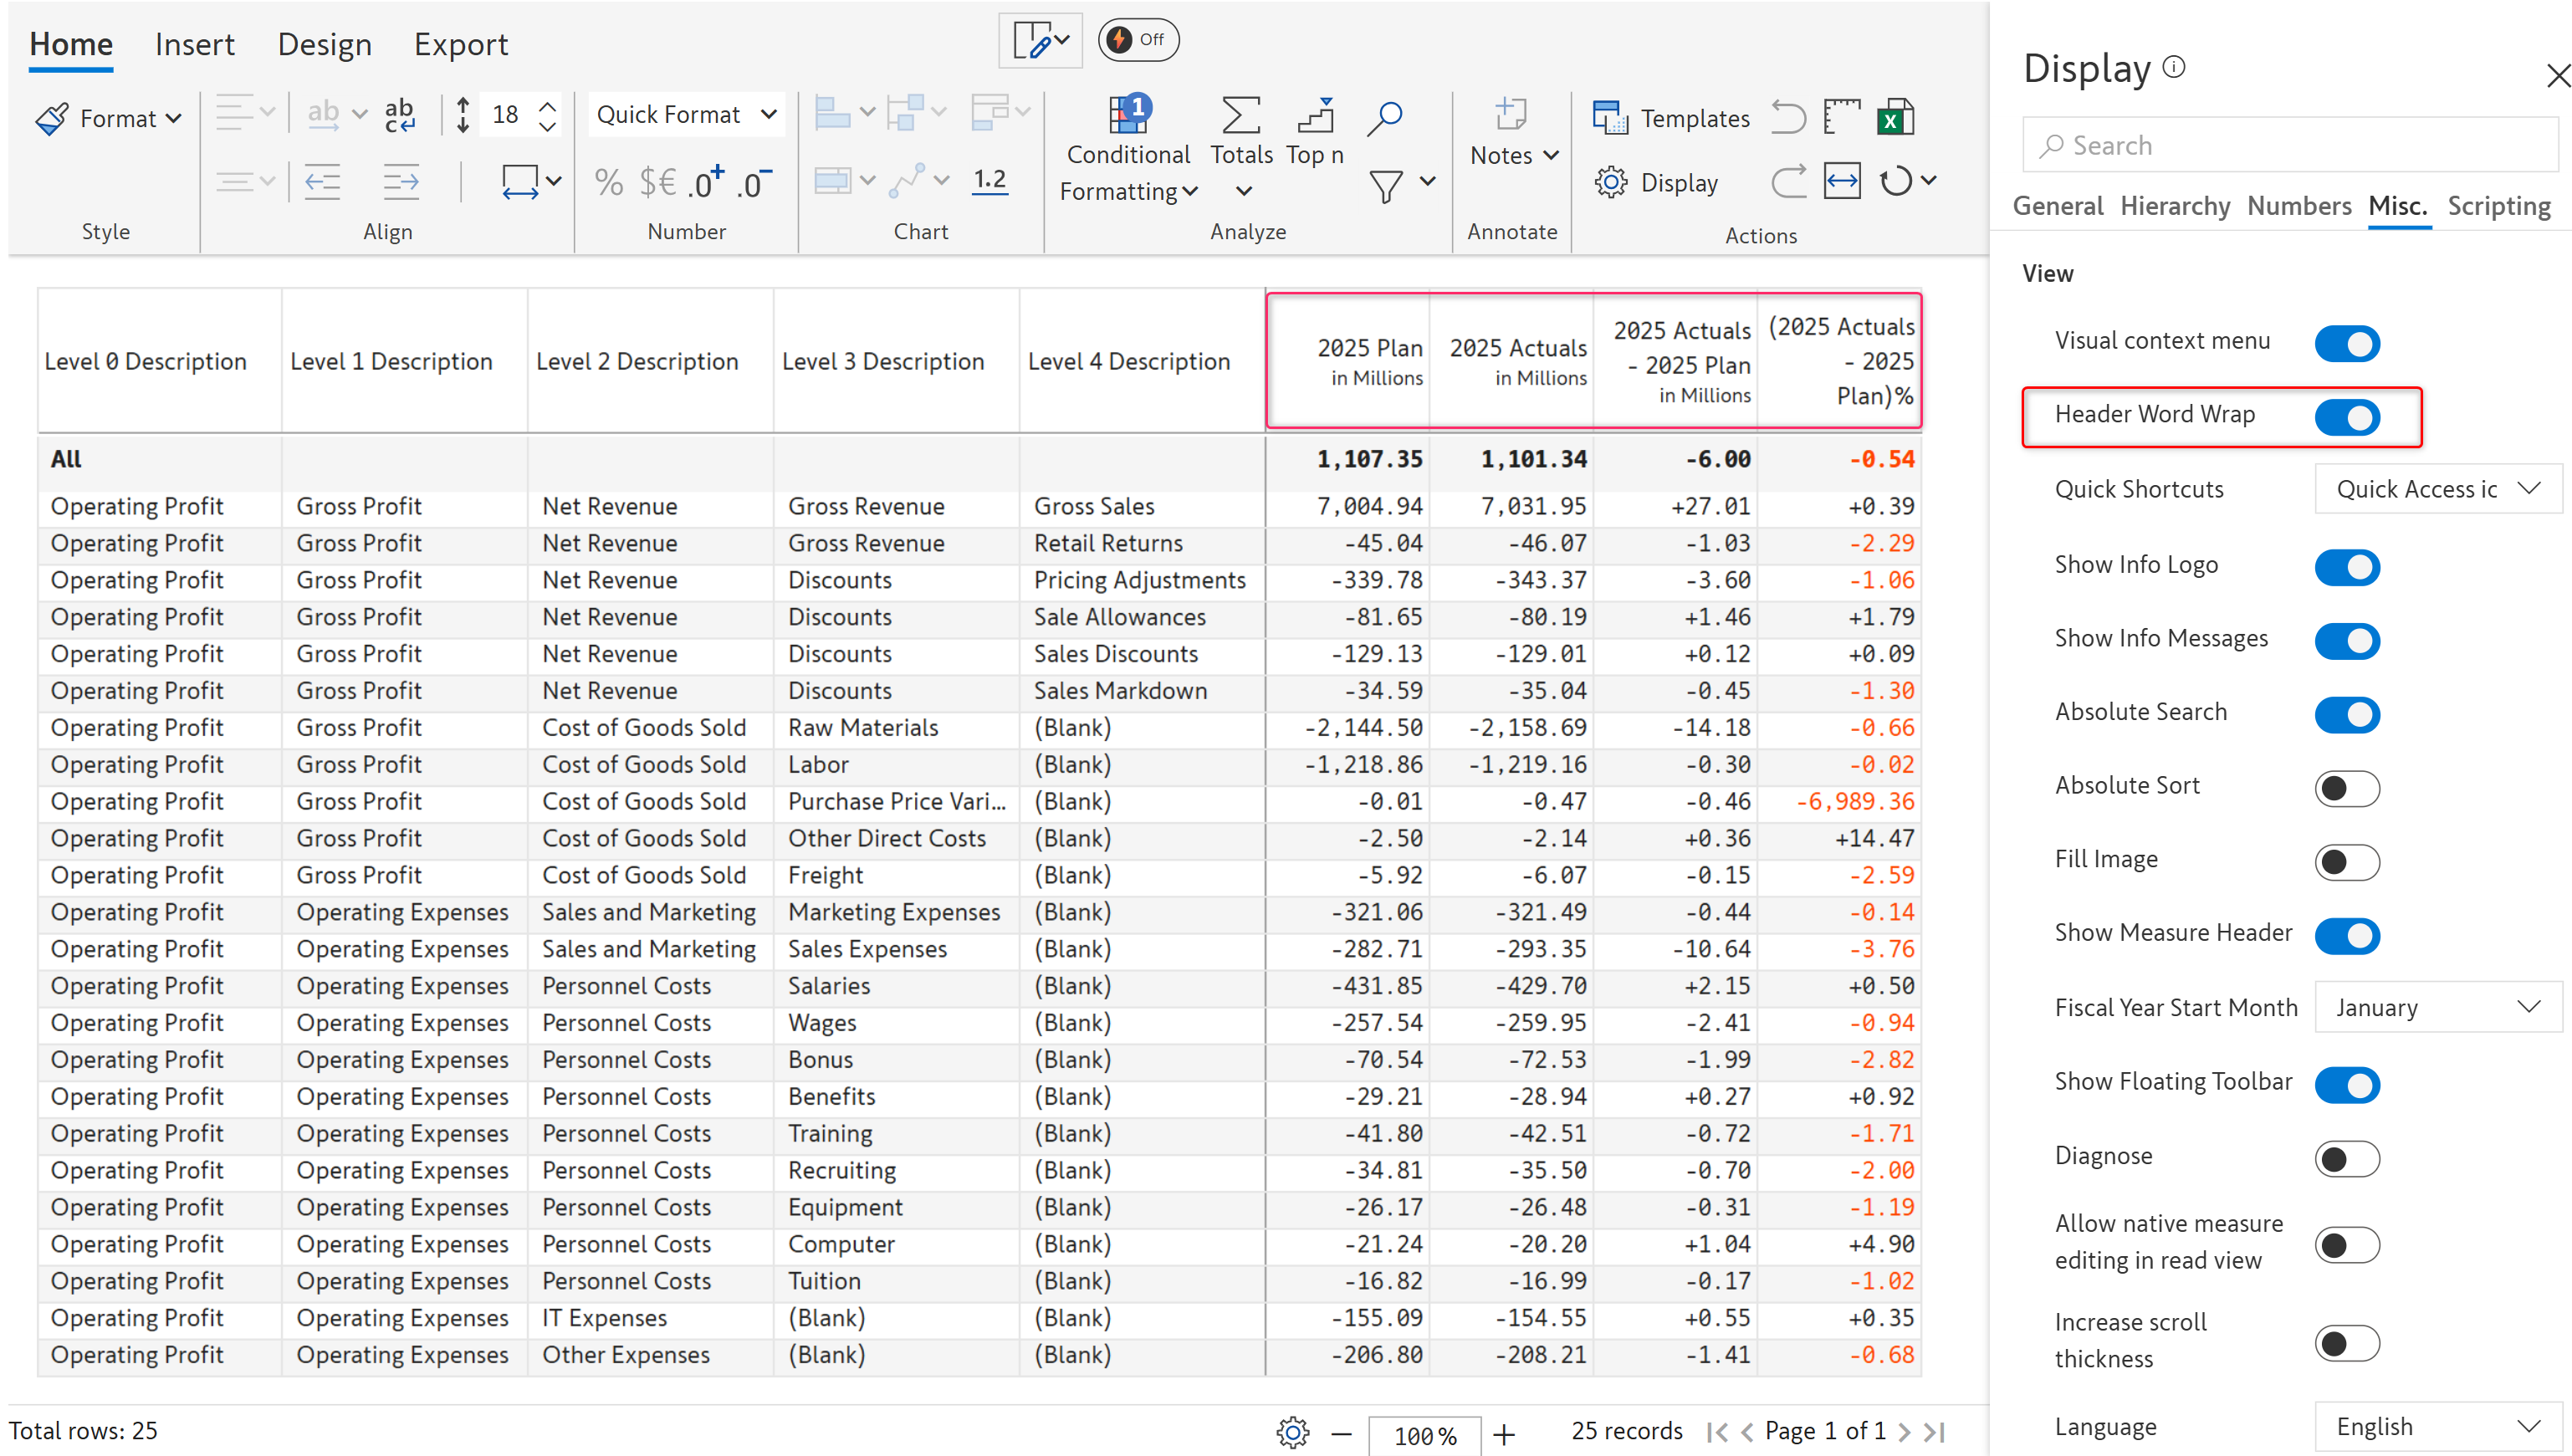
1.2. Header word wrap
When the Header Word Wrap option is enabled, the header content is wrapped according to the height of the cell. The image below shows how the headers are displayed when the header word wrap option is disabled.

You will be able to see the entire header when word wrap is enabled.

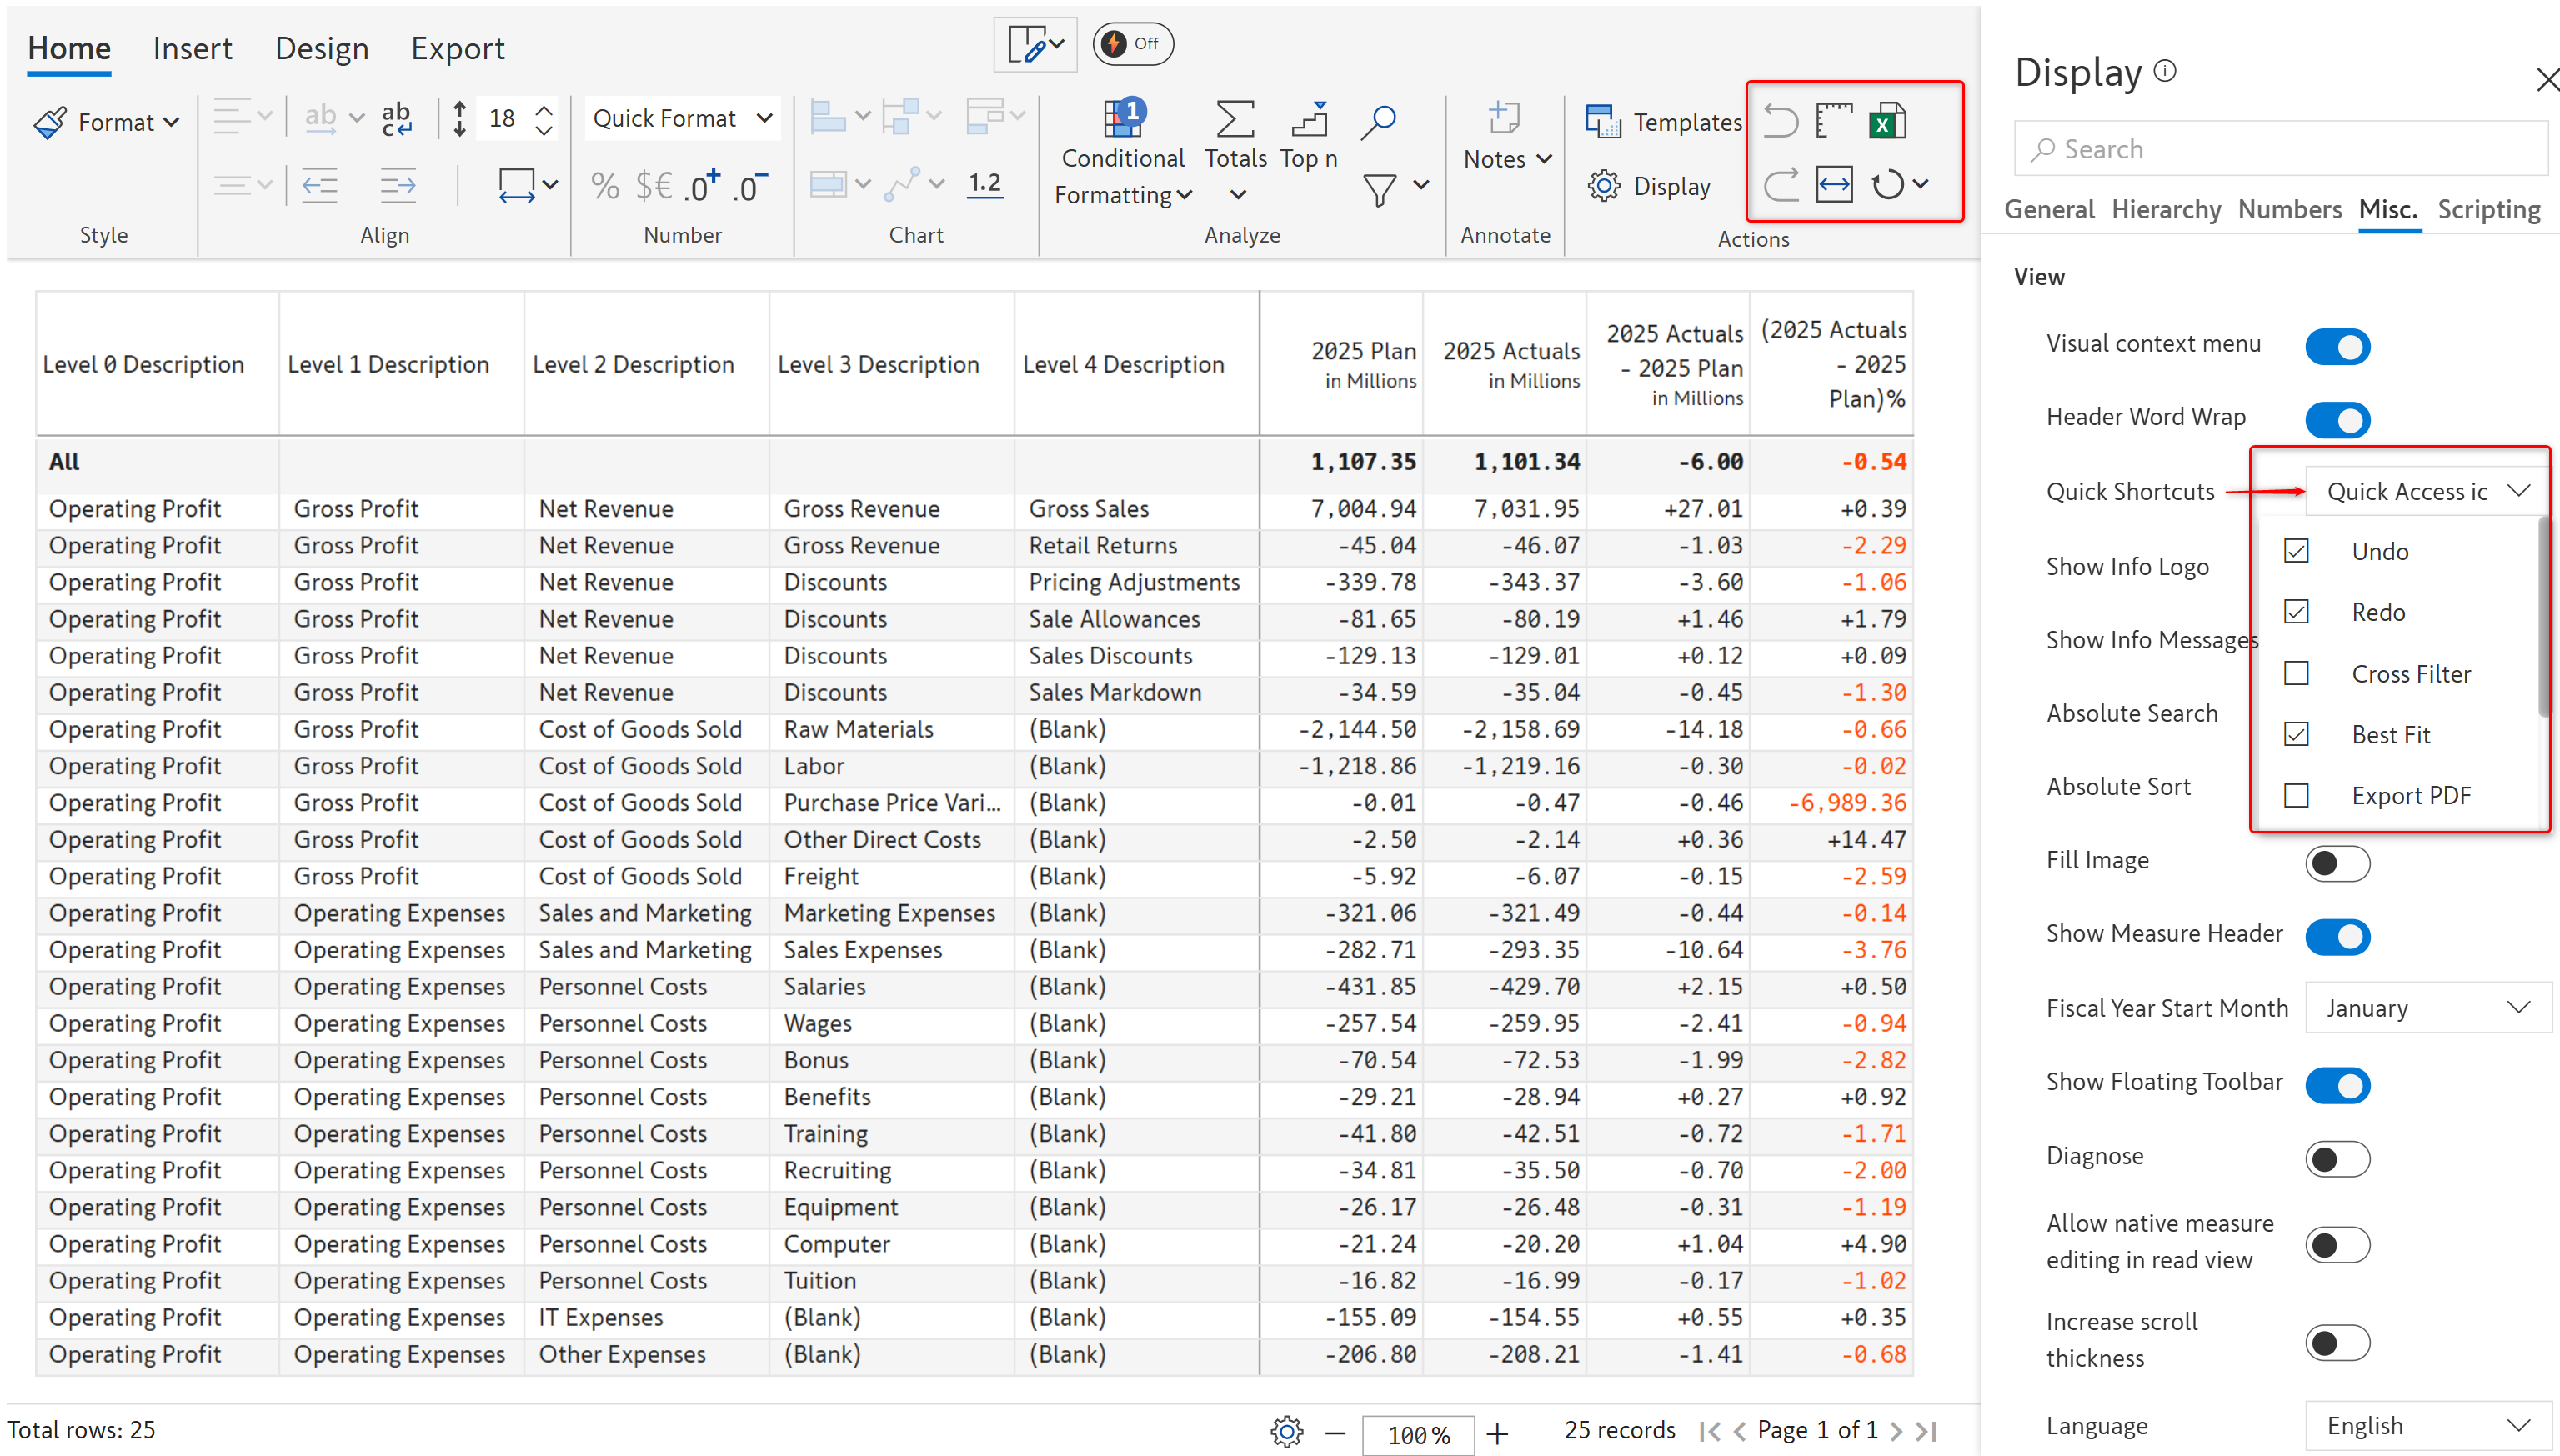
1.3. Quick shortcuts
This option lets you add quick shortcut icons in the Actions section. The Undo, Redo, Export as Excel, and Best Fit options are selected by default. You can select additional options, including Export PDF, Aggregation, and Smart Analysis. The shortcuts for all the selected options will be displayed in the Actions section.

1.4. Show info logo
You can click on the Inforiver Table logo at the bottom right-hand corner of the visual to get a synopsis of the report. You can quickly verify the license details and statistics, like the number of measures and rows in your report.
Enable the Show Info Logo option.


1.5. Show info messages
You can disable this option if you do not wish to see pop-up notifications and info messages

1.6. Absolute sort
Enabling this option will sort measures based on their magnitude, regardless of whether the value is positive or negative.
Notice how the values are sorted desc based on magnitude when absolute sort is turned on.


1.7. Show measure header
The column or measure headers will be hidden if this option is disabled.


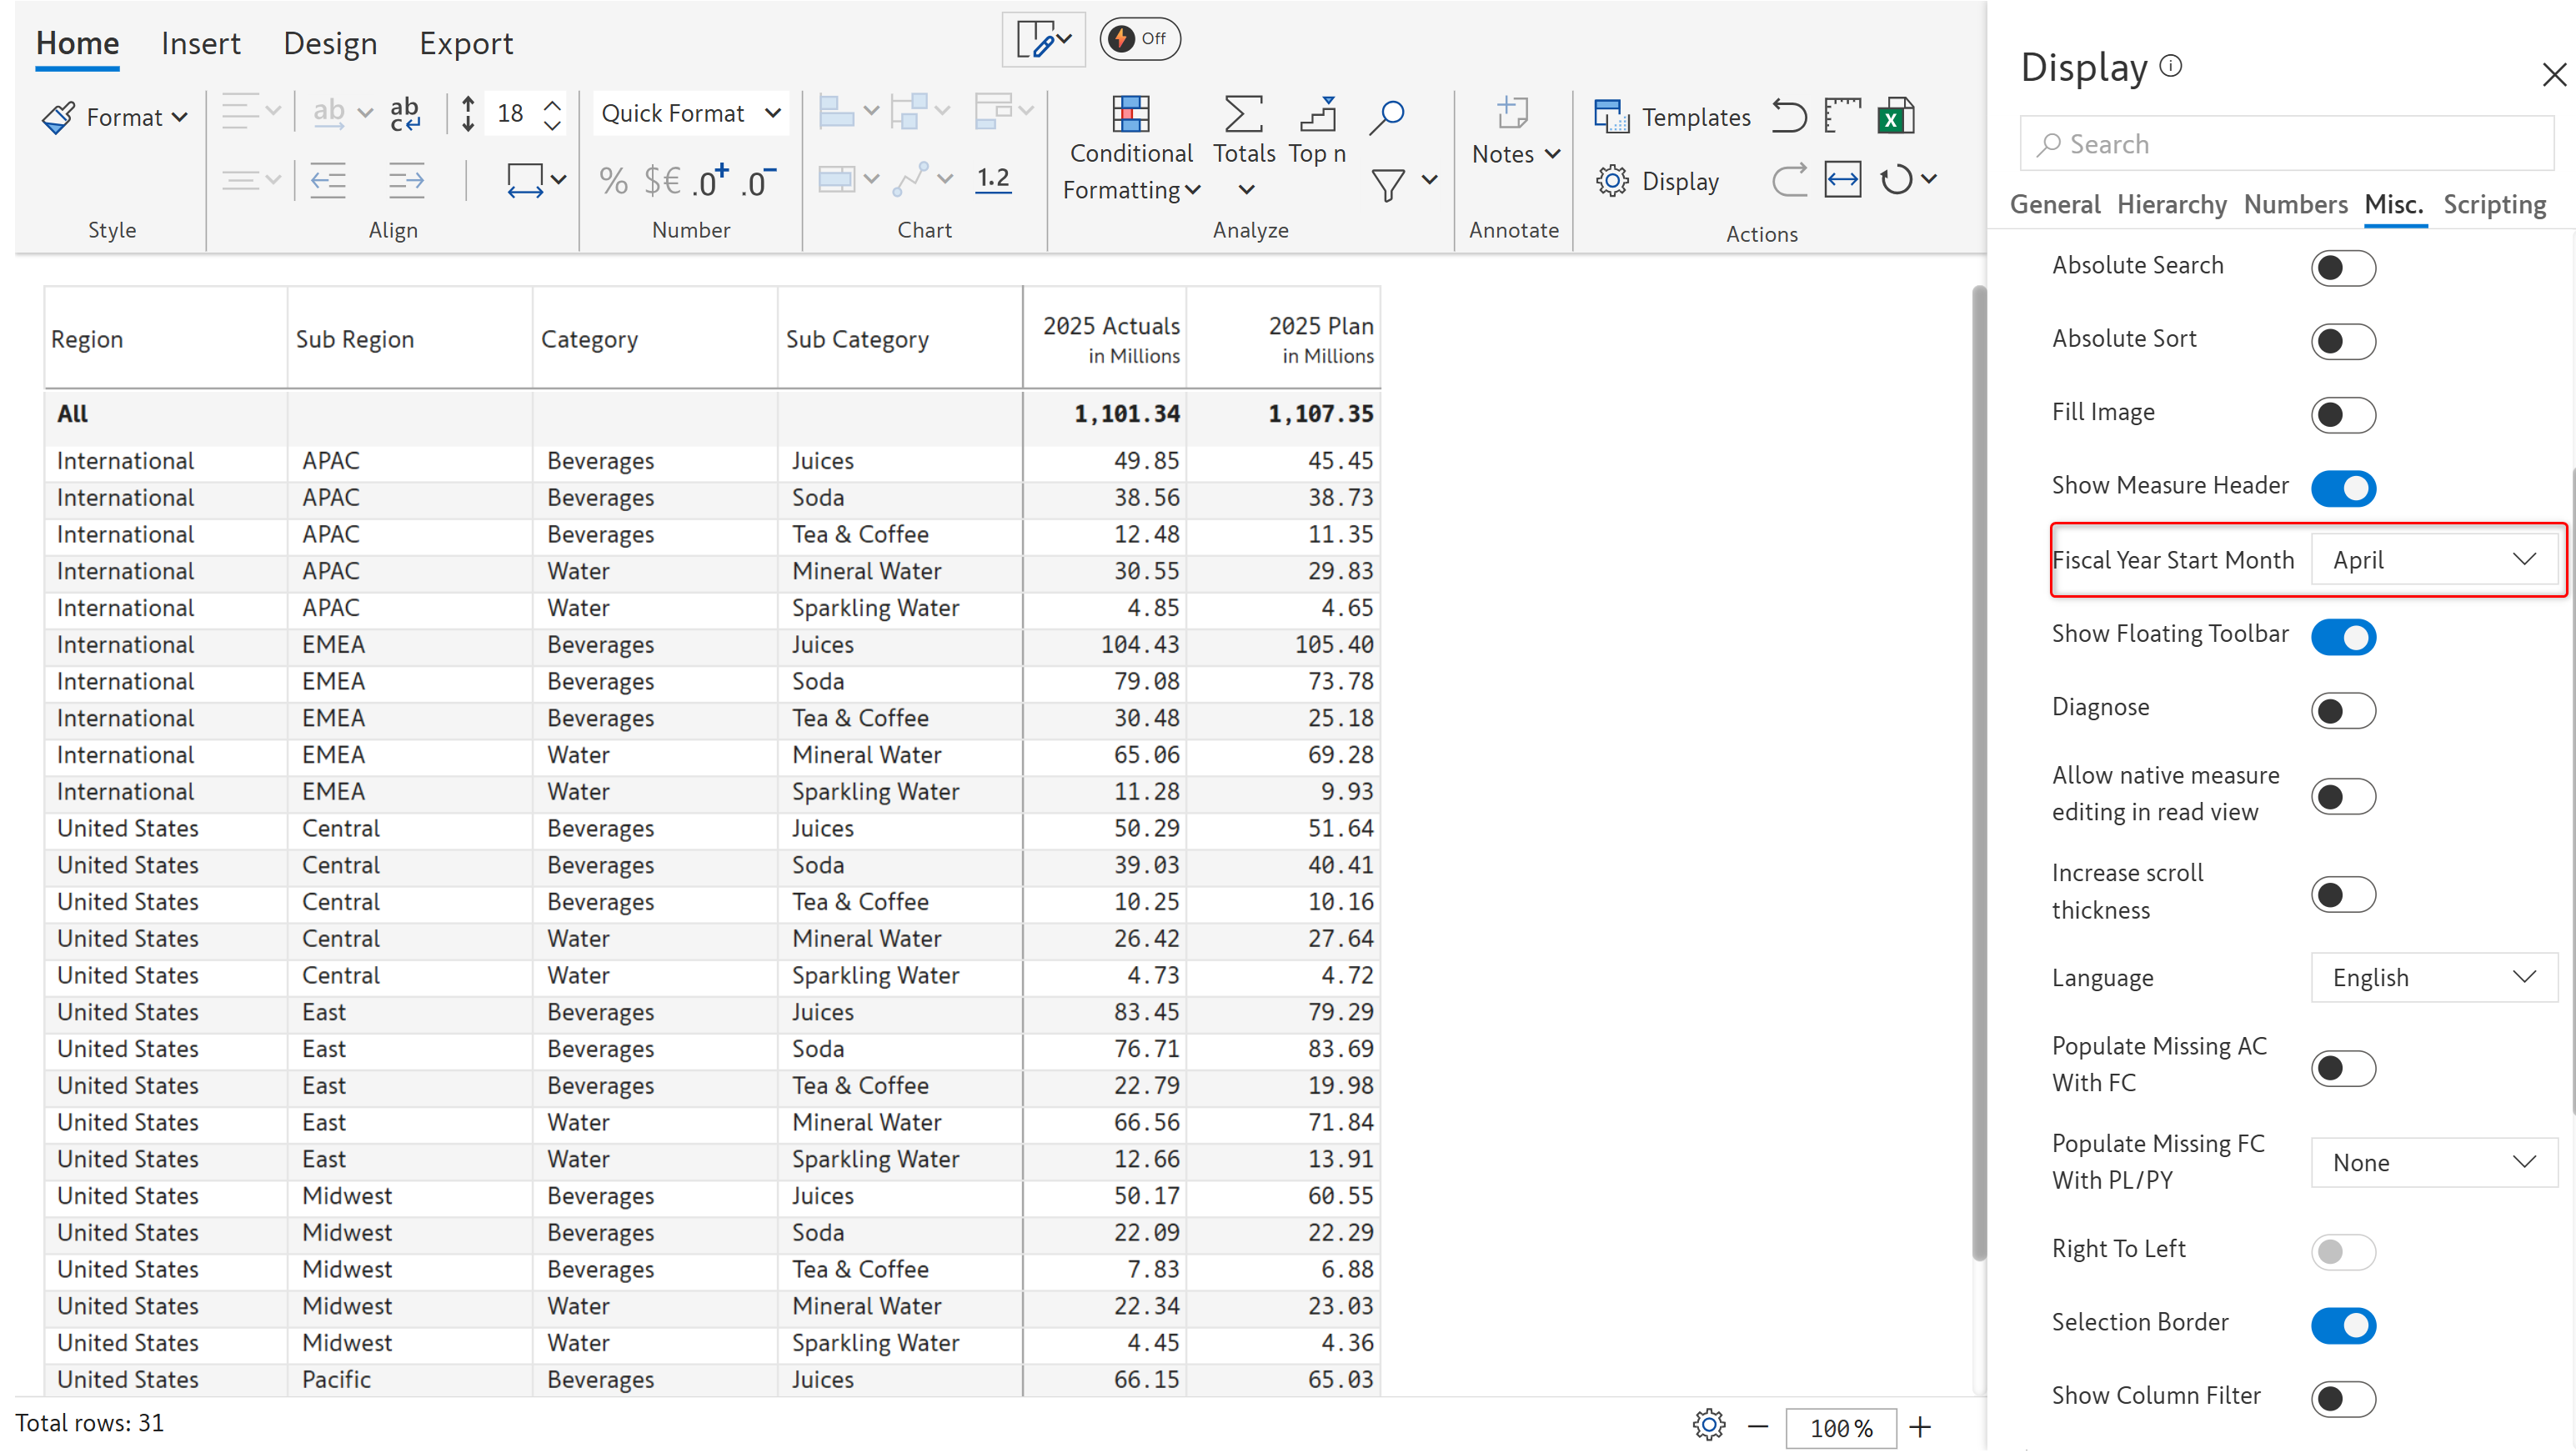
1.8. Fiscal year start month
Inforiver supports planning, budgeting, and forecasting for fiscal periods as well. You can set the start month of the fiscal year using this option.

1.9. Show floating toolbar
When the main toolbar has been unpinned, you will still be able to apply cell-level formatting, show/hide cell values, and add comments using the floating toolbar. Disable this option if you do not require the floating toolbar.

1.10. Diagnose
This option can be enabled if you wish to mask your data and generate random values when the data is being shared, and security is a concern.
1.11. Allow native measure editing in read view
If this option is enabled, report users in the reading view can update native measures.
1.12. Increase scroll thickness
You can increase the thickness of the horizontal and vertical scrollbars using by enabling this option.

1.13. Populate missing AC with FC
When you have actual and forecast measures in your report, if the AC values are missing for a particular category, Inforiver can populate FC values instead of AC.


1.14. Selection border
You can optionally remove the border box that is rendered when a cell/column/row is selected. The border box will not be displayed when the Selection Border toggle is disabled from display settings.


1.15. Show column filter
Easily filter your data by keying in the value in the search textboxes that are enabled when you turn on this toggle. Click the filter icon to select the comparison.

2. Status bar
2.1. Show status bar
You can show/hide the status bar with this option. If this option is enabled, the Status Panel Aggregation option becomes available.
2.2. Status panel aggregation
The Status Panel Aggregation option allows you to show the aggregation, such as sum, average, min, max, and count, for the values selected in the visual. In the example below, you can see the sum, average, and count aggregation for the selected values/measures in the status bar.

3. Cell/row/column
3.1. Global error handling
Inforiver provides a global error handling setting that internally handles missing reference errors and converts the missing values to 0 when used in calculations.

Notice how a missing reference error is displayed when the error handling setting is disabled.

3.2. Edit cell indicator
This option allows you to identify the edited/modified cell values in the visual. If you enable this option, the modified cell values are indicated by a pencil icon next to the corresponding values.

3.3. Show row indicator
You can identify manually inserted rows by enabling this option. A pencil icon is displayed next to data input or calculated rows.

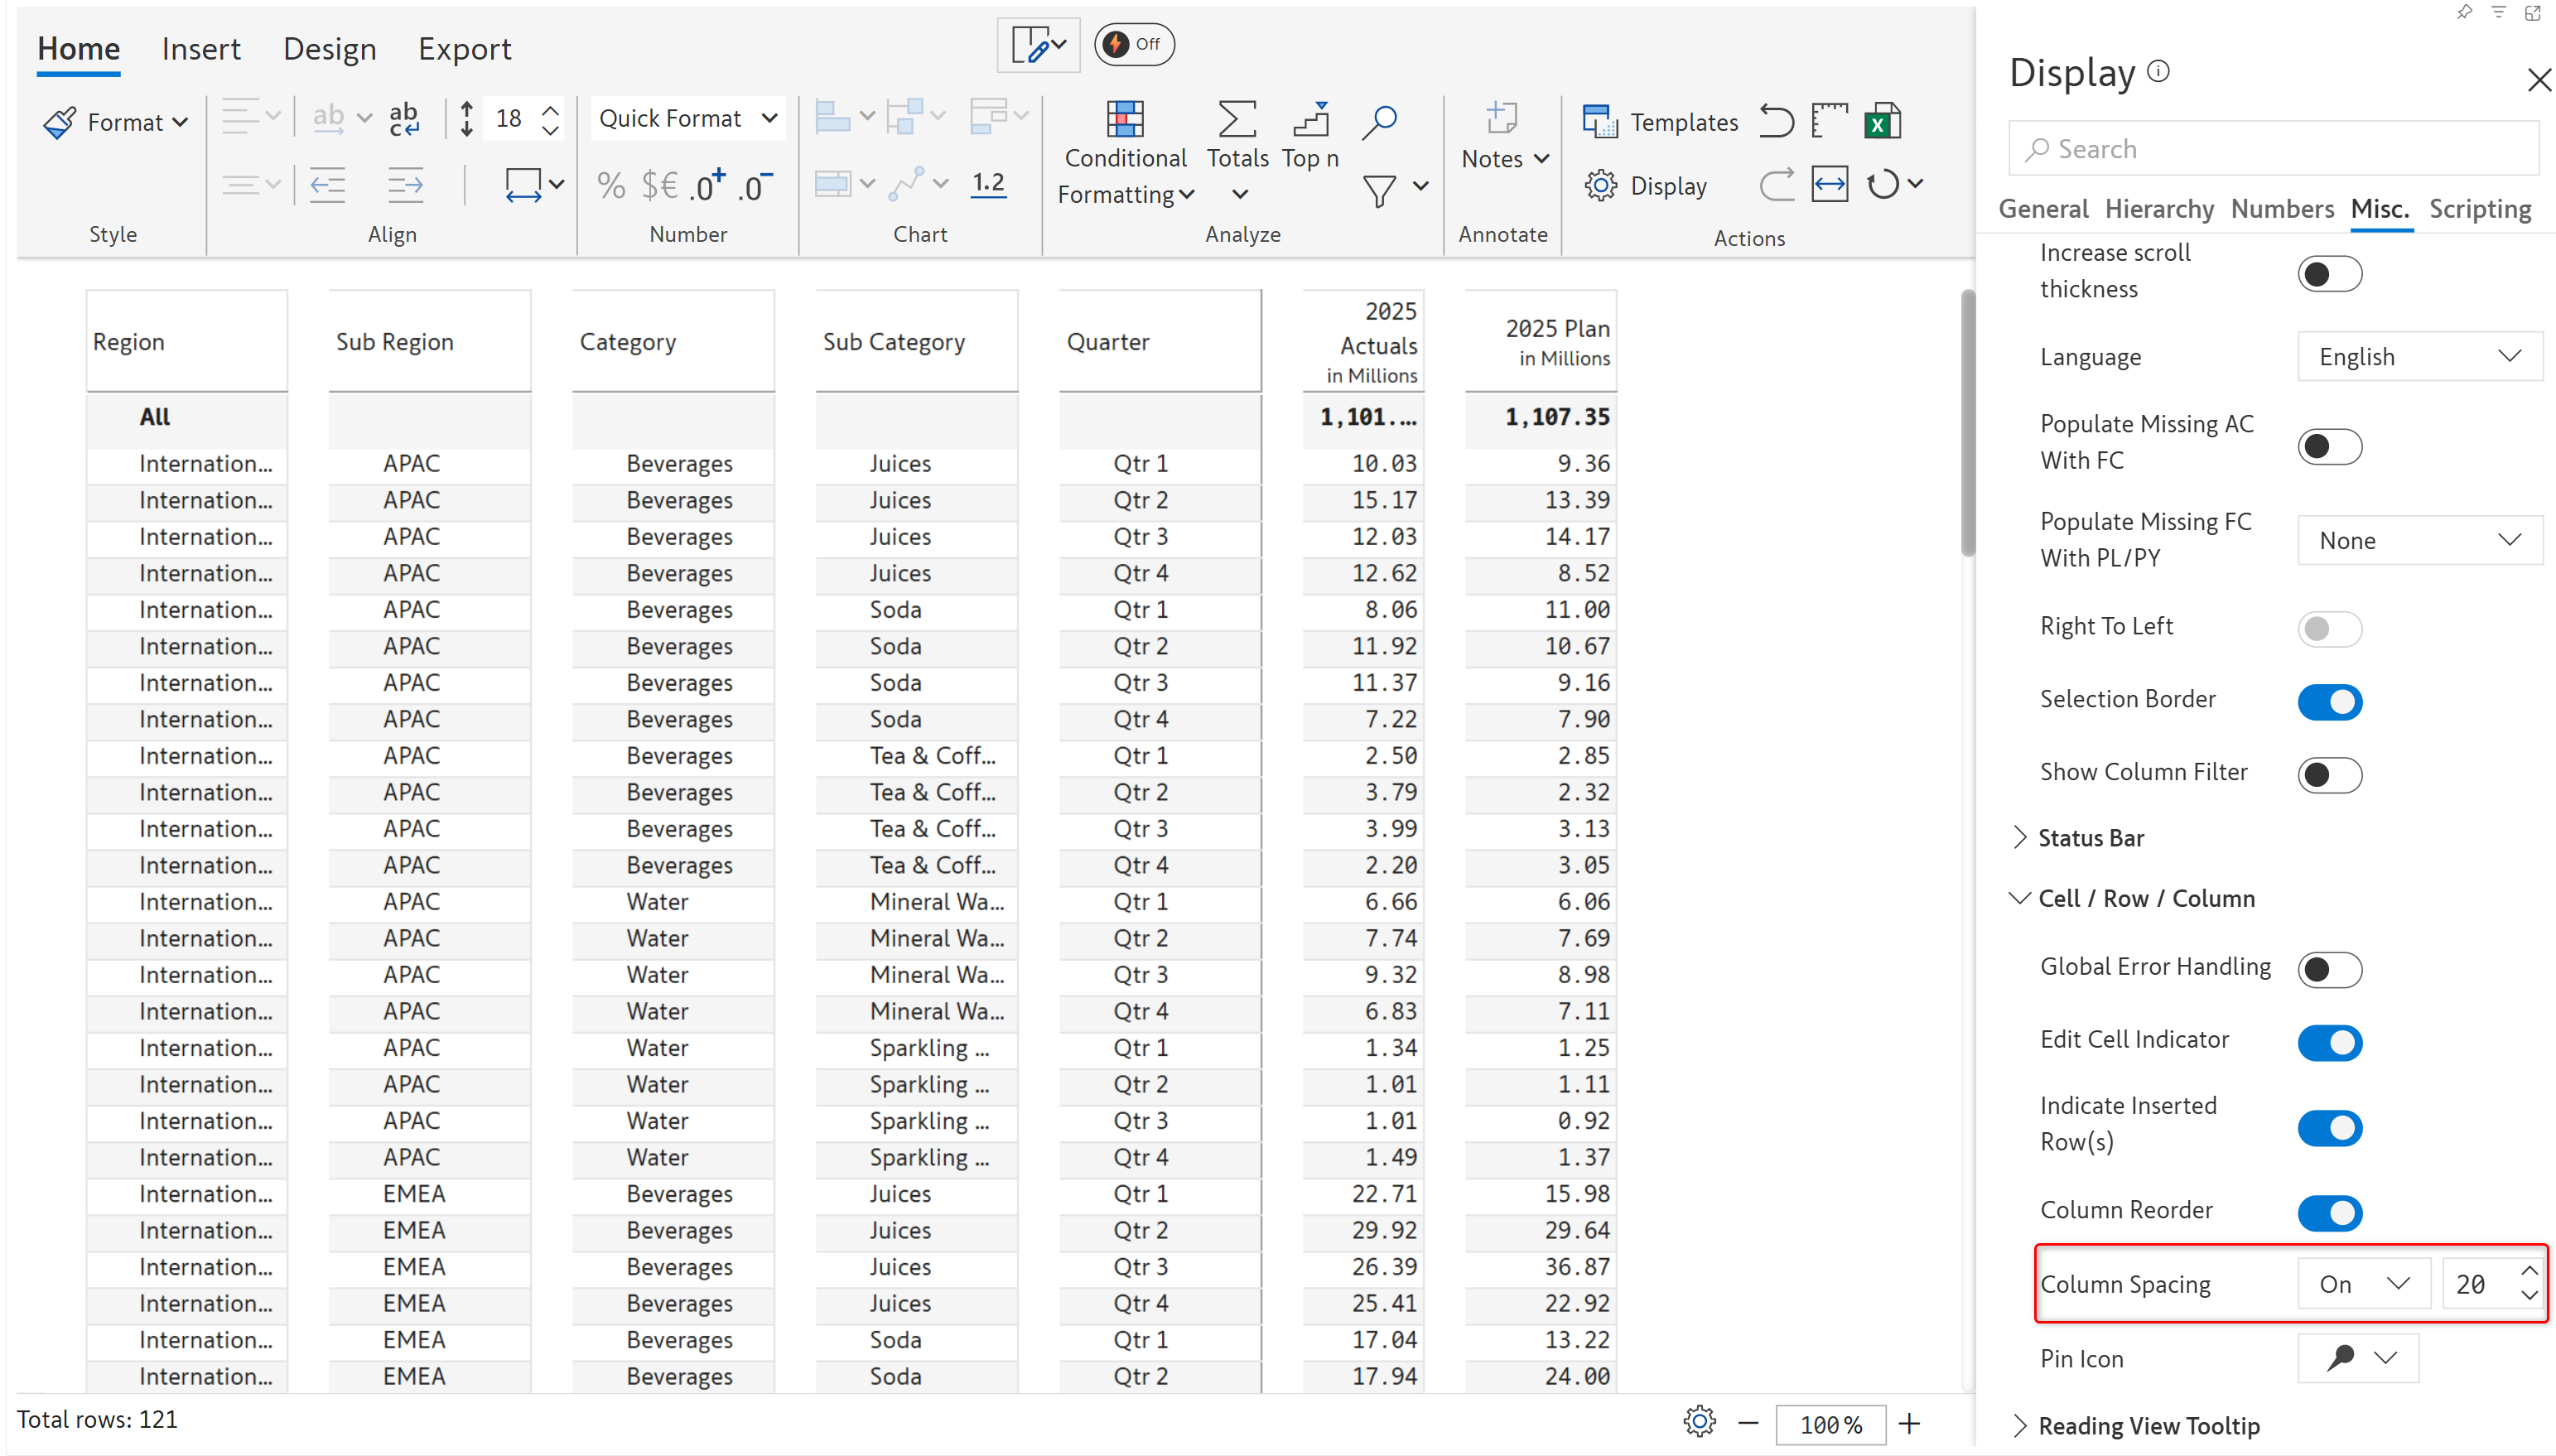
3.4. Column spacing
This option allows you to adjust the spacing between the columns. If this option is turned on, you can specify the required column spacing in the input field.
The minimum and maximum values of column spacing are 0 and 20, respectively.

3.5. Column reorder
This option allows you to reorder the columns. If this option is turned on, you can drag and drop columns to change their order.

Last updated
Was this helpful?