Cell, header & value formatting
Change the font color, style, size, and text alignment in a cell, or apply formatting effects in Premium Table - these are available in the Home ribbon of the toolbar in the Style and Align sections.

1. Style options
1.1. Font style and size
The default font is Inforiver Sans, which has been specifically designed for use in financial and tabular reports. But you can change to a different font from the dropdown menu and change the default size.

1.2. Increase/decrease font size
Font size can also be changed by using the Increase/Decrease font size options.

1.3. Font formatting style
Bold, Italic, and Underline styles can be applied.

1.4. Font/background color
You can use the fill color option to apply background color to an entire column or column or even an individual cell. Use the font color option to change the foreground color or the font color of the data values, row or column headings, and subheadings.

1.5. Format painter
You can copy cell formatting using the Format Painter option, just like Excel.


1.6 Borders
Premium Table provides several predefined border styles, and they can be applied at a cell/row/column level. If the predefined cell borders do not meet your needs, you can create a custom border by clicking on the 'Custom' option.

To remove custom borders, click on 'Reset' or select the 'No borders' option (the 1st icon).
To remove the predefined borders, click on the 'No borders' option (the 1st icon).
2. Alignment options
2.1. Horizontal/vertical alignment
Horizontal alignment can be formatted using the align left, right, and center options. For vertical alignment, the options are align top, bottom, and middle.

2.2. Header orientation
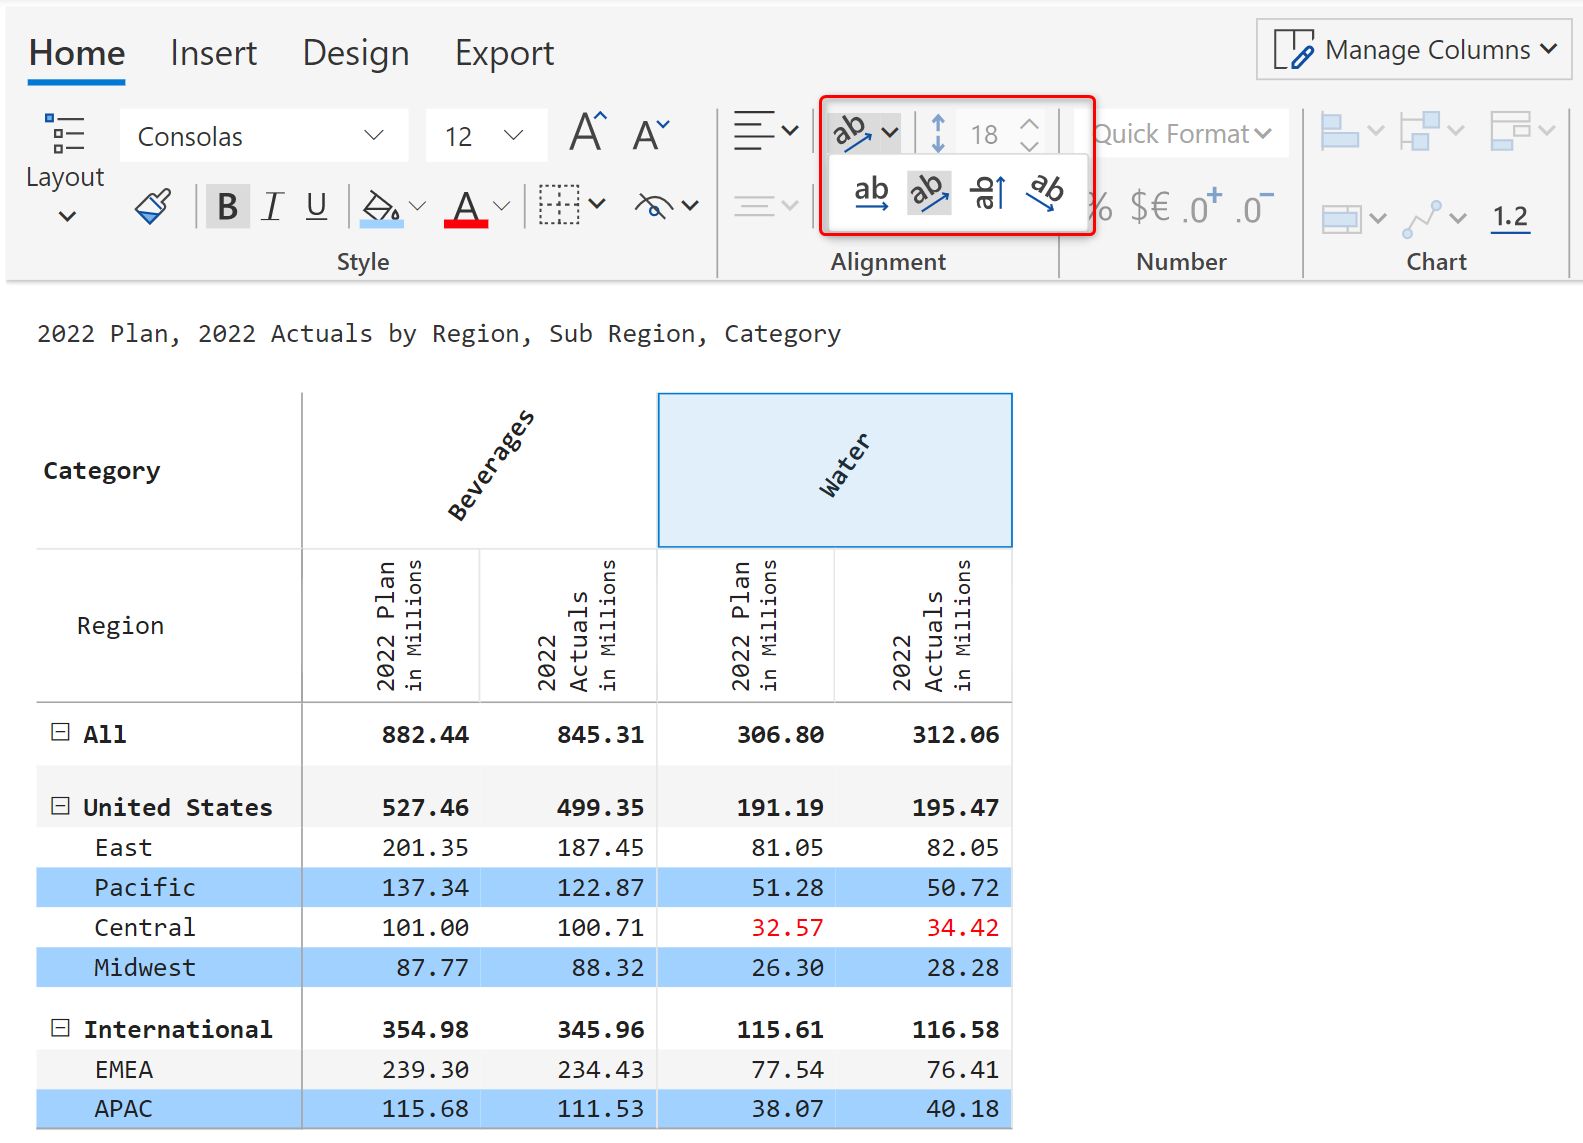
Column and measure header orientations can be changed using the highlighted options. This is very helpful when you have a lot of columns in your report.

2.3. Increase/decrease indent
Use the indentation icon from the toolbar to indent specific values. This feature makes creating financial statements a breeze.
2.4. Row height
You can increase or decrease row size manually. This is especially useful when inserting inline charts.

2.5 Word wrap
If your measure headers are very long, you can enable the word wrap option to ensure that the entire header is displayed.

2.6. Fit Content
You can choose the fit mode that is best suited for your data.


Use the 'Manual Column Width' option to open Column Settings and manually enter the width for each column.
Enable to Lock Size toggle to prevent changes to the width of the columns in your report.
3. Auto-format for column dimensions
Select the header only, without selecting the measure values with the Select Header option in the column gripper.

This feature comes in handy when you need to apply formatting to a specific measure header.

In the next section, we'll see how to handle totals & subtotals.
Resources
Last updated