Invert sign
In the case of financial reports such as the P&L statement, data for expense or deduction items are often shown as positive numbers. This is especially true when the income and expense values come from different tables. However, the report might need to be updated with the negative sign operator for two main purposes.
(a) for performing aggregations, say for naturally aggregating revenue & expense accounts to calculate profit, or
(b) to display +/- signs in the table to indicate which accounts are added vs. deducted.
This can be easily achieved using the 'Invert' option in Inforiver.
1. Row/cell level
You can invert cells or rows and display the negative signs at a cell level. You can also define whether the negative signs should influence the total or not.
Let’s invert the Computers > Laptops row.
1.1. Select the row. Click the Invert option from the Row section of the Insert ribbon.

1.2. Notice how the measure values are inverted for that row. The grand total row is also updated accordingly.

1.3. If you do not want the sign inversion to impact the totals, turn off the Influence Total toggle in the Display -> Numbers settings.

1.4. Click Invert again with the respective row selected to reset to the default value. A pop-up opens with a notification message. Click Apply to reset and restore the original values.

1.5. Note that the signage of calculated rows cannot be changed. The invert option is disabled for the calculated row '4k Monitor'.

1.6. Enable the Highlight inverted rows toggle from Display settings > Numbers tab to spotlight rows that were inverted manually at the visual level.

1.7. Inverting cells is just like inverting rows - select the cells that need to be inverted and click the Invert button.


1.8. Enable the Highlight inverted cells toggle from Display settings > Numbers tab to spotlight cells that were inverted manually at the visual level.

2. Measure level
2.1. Create a new signed measure
This feature is a single-click solution to creating signed measures. To invert a particular measure, select it and click on the Invert button in the Column section of the Insert ribbon. This opens the Formula Measure side pane.

Click Create to insert the new calculated measure in the report.

3. Sign from a source dataset
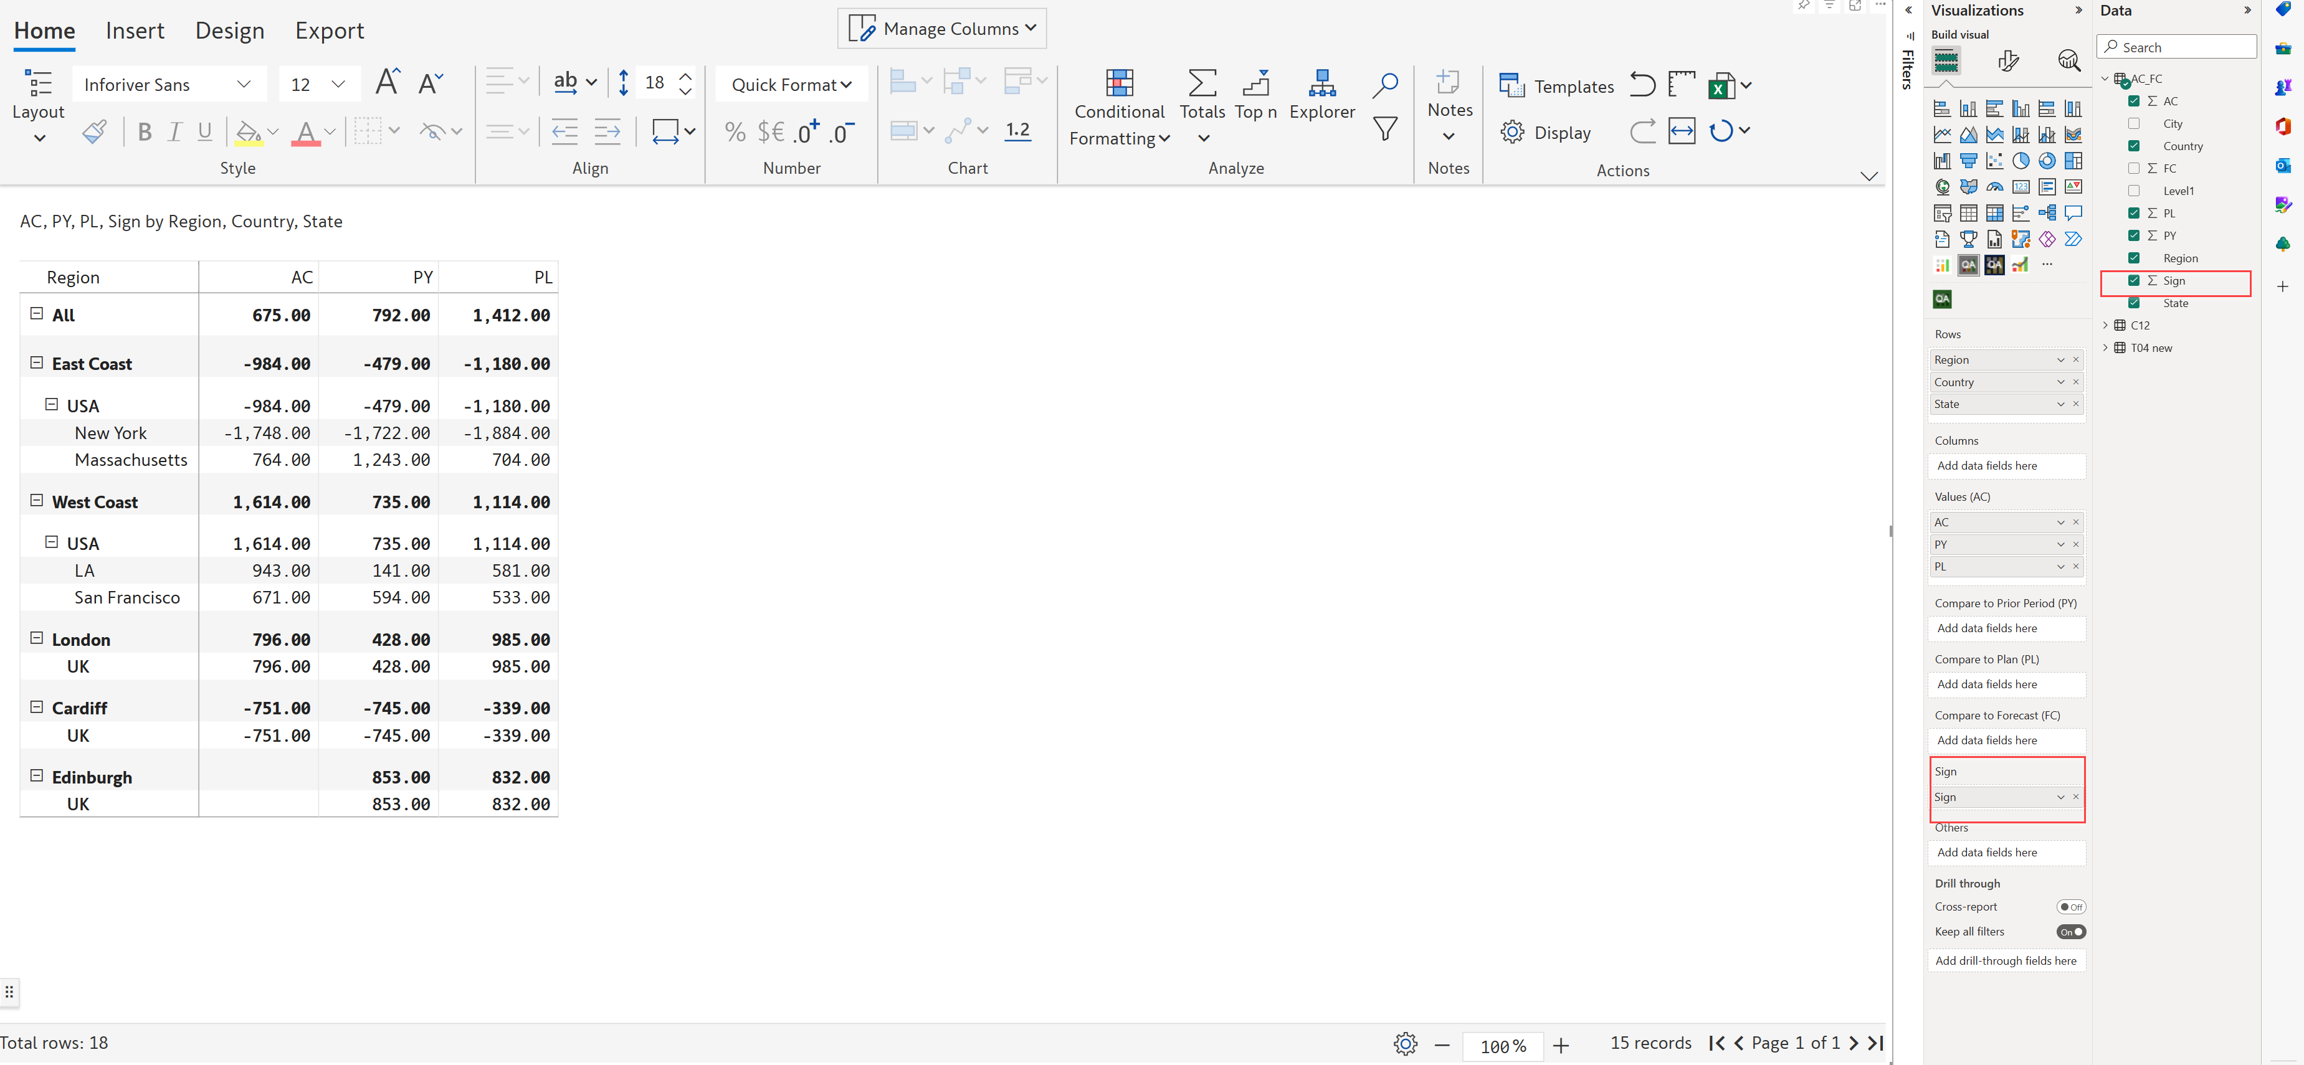
Instead of defining positive and negative signs at the report level, you can use the sign conventions from your data source tables. To do this, create a column that assigns values -1, +1, and 0 for negative, positive, and totals respectively. A sample table is shown below.

a) Add this sign column in the 'Sign' field. You can see the change in the values in the below image and also the calculation of subtotals and totals.

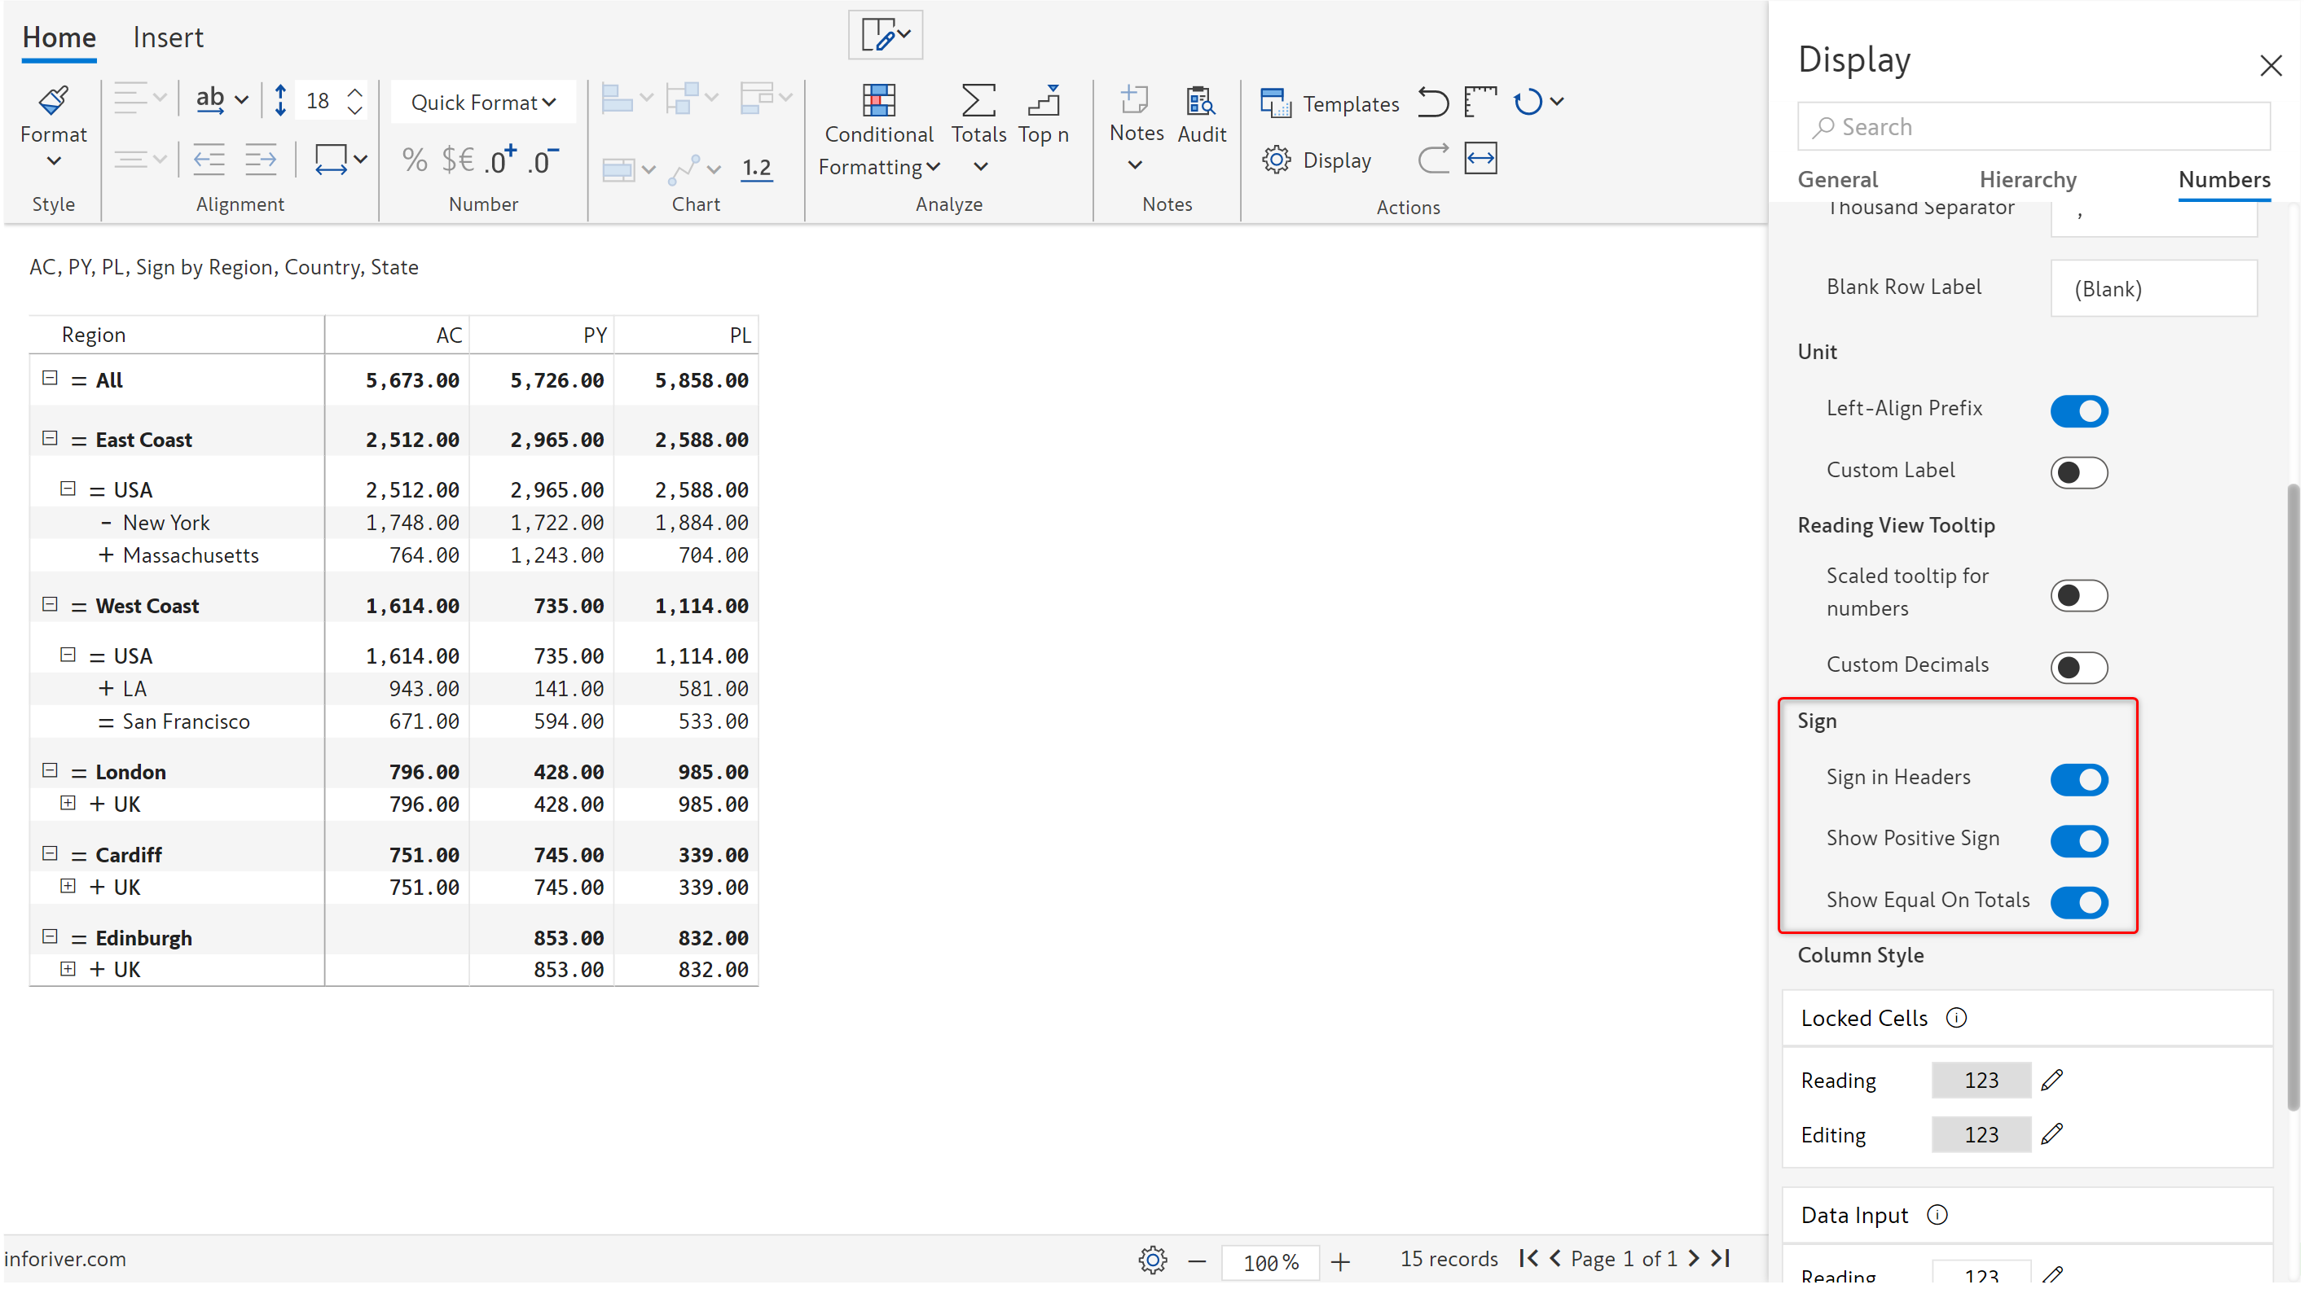
b) On enabling the 'Sign in header' option, you can see the positive, negative, and total rows with the signs in the header.

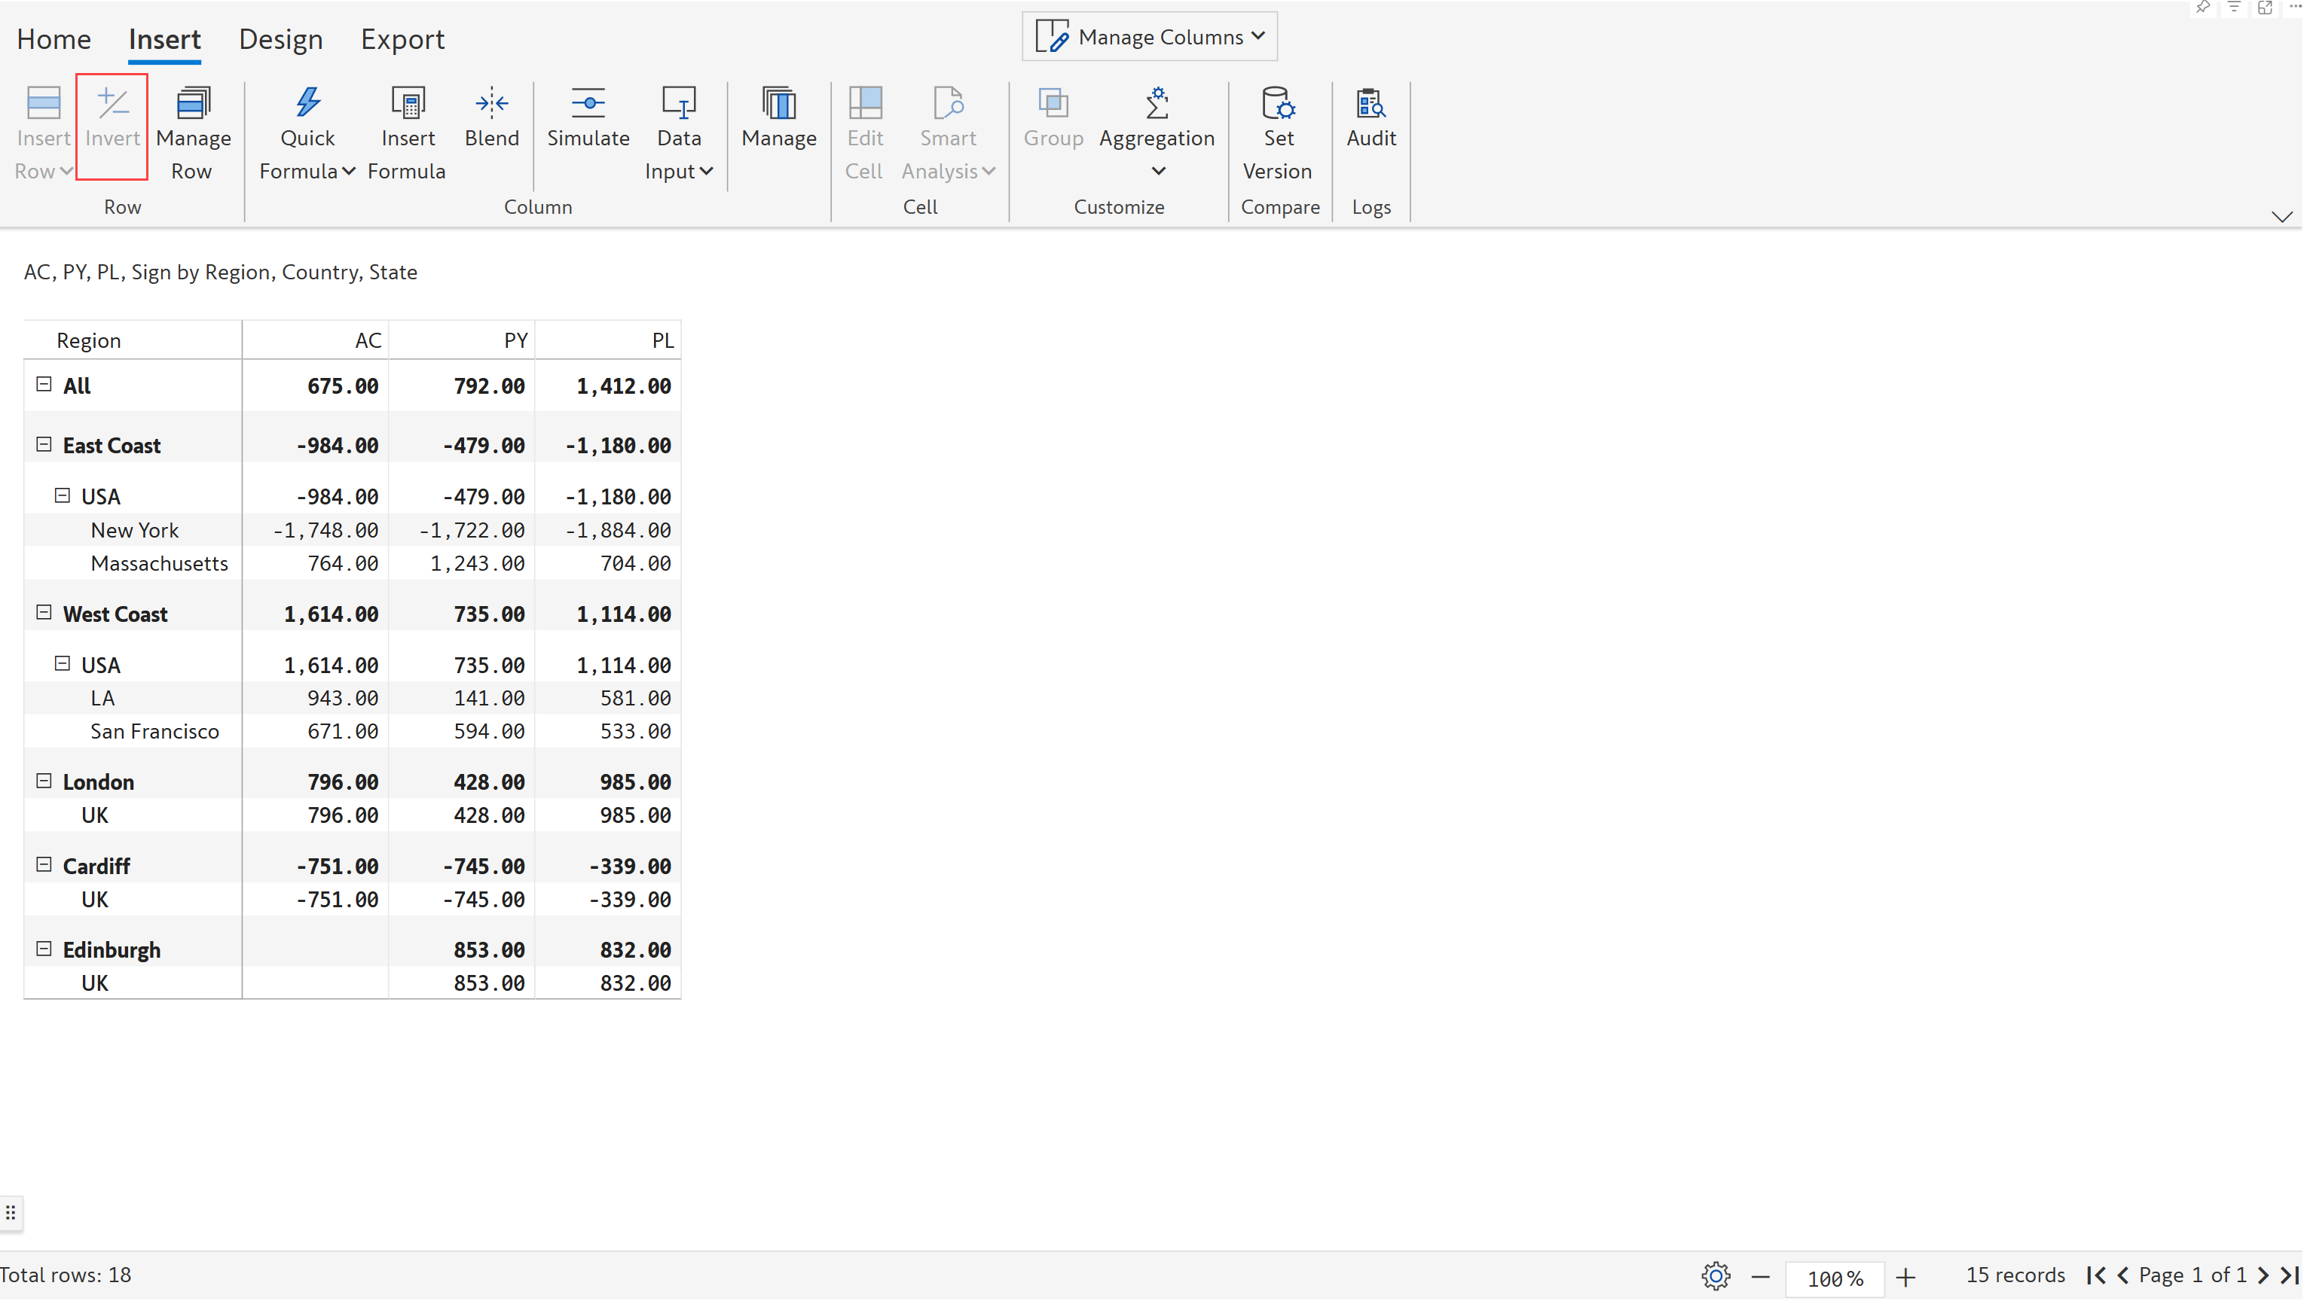
c) The 'Invert' option is disabled when the sign column is added.

Last updated
Was this helpful?